Difference between revisions of "Navmeshing"
MrDragonorg (talk | contribs) |
MrDragonorg (talk | contribs) |
||
| Line 1: | Line 1: | ||
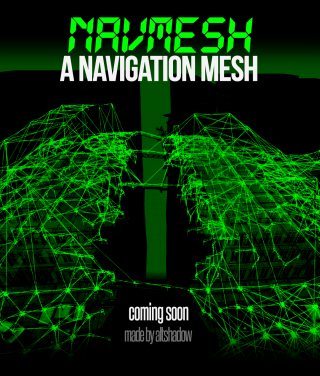
[[File:Navmeshing article.png|thumb|right|upright=1.05|<div style="text-align: right">''Art by AltShadow.''</div>]] | [[File:Navmeshing article.png|thumb|right|upright=1.05|<div style="text-align: right">''Art by AltShadow.''</div>]] | ||
<span style="color:orange">'''Navmeshing'''</span> – the process of creating navigation for bots, or more simply, creating paths so that bots can work correctly on a given map. There are many different types of bots that are used for the zs gamemode: AzBots, D3Bots, MarcoBots, etc. | |||
MarcoBots are currently used on Sunrust servers. MarcoBots are not open-source bots, they are private and exclusive type of bots and you cannot download them for your single player. Therefore, the navmesh creation takes place on a dedicated server (or directly in the main server itself). | MarcoBots are currently used on Sunrust servers. MarcoBots are not open-source bots, they are private and exclusive type of bots and you cannot download them for your single player. Therefore, the navmesh creation takes place on a dedicated server (or directly in the main server itself). | ||
| Line 35: | Line 35: | ||
== Required commands and control == | == Required commands and control == | ||
To be able to create navmesh, you need to be granted access to a dedicated navmesh server. Contact Scott to have access to dev server: <u>Scott#3224</u>. After obtaining the necessary rights, you can connect to it and begin to create navmesh. | |||
Dev Server IP: 104.194.10.86:27020 | |||
<span style="color:orange">'''Dev Server IP: 104.194.10.86:27020'''</span> | |||
Next, you need to get the navmesh tool and start creating the navmesh. Let's look at the required commands for this: | Next, you need to get the navmesh tool and start creating the navmesh. Let's look at the required commands for this: | ||
[[ | [[File:Console commands.png|frameless|none|upright=2.5]] | ||
[[File:Navtool weapon choice.png|thumb|right|upright=0.8|<div style="text-align: right">''Select navmesh tool.''</div>]] | |||
{| class="wikitable" style="width: 750px;" | |||
|- style="vertical-align: center;" | |||
! scope="row" style="width: 13%;" | <span style="color:orange">/navmeshtool</span> | |||
| style="padding: 0.5%;" | Gives you a navmesh tool | |||
|- style="vertical-align: center;" | |||
! scope="row" style="width: 13%;" | <span style="color:orange">/startmeshing</span> | |||
| style="padding: 0.5%;" | Gives you a navmesh tool, god mode and an infinite wave time | |||
|- style="vertical-align: center;" | |||
! scope="row" style="width: 13%;" | <span style="color:orange">/changemapnavmesh <br>mapname</span> | |||
| style="padding: 0.5%;" | Allows you to change the map on server | |||
|- style="vertical-align: center;" | |||
! scope="row" style="width: 13%;" | <span style="color:orange">zs_admin_purgepaths</span> | |||
| style="padding: 0.5%;" | Completely clears navmesh (SA only,console command) | |||
|- style="vertical-align: center;" | |||
! scope="row" style="width: 13%;" | <span style="color:orange">/give weapon_zs_adminpathtool <br>PlayerName</span> | |||
| style="padding: 0.5%;" | Alternative way to get navmesh tool (SA only) | |||
|} | |||
Path edit mode | |||
Path draw distance | After you give yourself a navmesh tool, you may notice <span style="color:teal"><u>'''control tips in the upper left corner.'''</u></span> | ||
Flags | |||
Hide Air Paths – Hides air nodes. | Disable the experience display in the options in <u>“F4 –> Interface”</u> to see them more correctly. If you also have <u>spark_currency_widget 1</u>, disable it as well. | ||
Hide Sublevel Paths – Disables the visibility of nodes you cannot see. | |||
When you hold down the <span style="color:orange">'''“Alt” key'''</span>. in the lower right corner, a <span style="color:orange">'''''menu for tool control'''''</span> will appear. Consider this interface: | |||
[[File:Navmesh menu.png|frameless|left|upright=2.5]] | |||
{| class="wikitable" | |||
|- style="vertical-align: center;" | |||
! scope="row" style="width: 13%;" | <span style="color:orange">Path edit mode</span> | |||
| style="width: 10%;" |[[File:Path edit mode options.png|frameless|center|upright=0.58]] | |||
| Allows you to select the navmesh type. Will be discussed in more detail below. | |||
|- style="vertical-align: center;" | |||
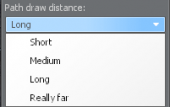
! scope="row" style="width: 13%;" | <span style="color:orange">Path draw distance</span> | |||
| style="width: 10%;" | [[File:Path draw distance menu.png|frameless|center|upright=0.58]] | |||
| Allows you to change the display range of nodes | |||
|- style="vertical-align: center;" | |||
! scope="row" style="width: 13%;" | <span style="color:orange">Flags</span> | |||
| style="width: 10%;" | [[File:Navmesh menu flags.png|frameless|center|upright=0.58]] | |||
| Ghost Mode – Gives you noclip. | |||
Hide Air Paths – Hides air nodes. | |||
Hide Sublevel Paths – Disables the visibility of nodes you cannot see. | |||
Draw Through Walls – Enables drawing nodes through walls. | Draw Through Walls – Enables drawing nodes through walls. | ||
|} | |||
Let's consider these options in more details. | Let's consider these options in more details. | ||
| Line 63: | Line 103: | ||
== Path edit mode == | == Path edit mode == | ||
path_edit_mode.png | <!--path_edit_mode.png | ||
=== Create Node === | === Create Node === | ||
Revision as of 18:10, 1 September 2020
Navmeshing – the process of creating navigation for bots, or more simply, creating paths so that bots can work correctly on a given map. There are many different types of bots that are used for the zs gamemode: AzBots, D3Bots, MarcoBots, etc.
MarcoBots are currently used on Sunrust servers. MarcoBots are not open-source bots, they are private and exclusive type of bots and you cannot download them for your single player. Therefore, the navmesh creation takes place on a dedicated server (or directly in the main server itself).
The advantages of MarcoBots is the simplicity navmesh creation, the automation of many bot actions, since you don’t need to specify when they need to jump or crouch, and a huge level of optimization, as a result these bot load server much less and this leads to less lags.
The better navmesh is created, the more powerful the bots will be, since they will know how to act in each area of the map. A good navmesh also affects the optimization, server network and is especially necessary for the correct work of Great Evils - exclusive zombie boss classes only for bots.
Terminology
| Navmesh (abbreviated "mesh") |
Navigation for bots. |
|---|---|
| Navmeshing | The process of creating navigation for bots. |
| Nodes | Points between which bots move and where they can find you. |
| Paths (or "links") |
Connections between nodes that allow or not move between specific nodes. |
| Areas | A special type of bot navigation that differs from nodes. Instead of nodes, you select the required area and the bot can find you if you are in it. Will be discussed this type of navigation in more detail below. |
| Targeting | A bot pathfinding for the closest or highest priority target. |
| Pursuit mode | The bot stops moving on the nodes and starts moving exactly behind you, is activated for ~200 units. |
Required commands and control
To be able to create navmesh, you need to be granted access to a dedicated navmesh server. Contact Scott to have access to dev server: Scott#3224. After obtaining the necessary rights, you can connect to it and begin to create navmesh.
Dev Server IP: 104.194.10.86:27020
Next, you need to get the navmesh tool and start creating the navmesh. Let's look at the required commands for this:
| /navmeshtool | Gives you a navmesh tool |
|---|---|
| /startmeshing | Gives you a navmesh tool, god mode and an infinite wave time |
| /changemapnavmesh mapname |
Allows you to change the map on server |
| zs_admin_purgepaths | Completely clears navmesh (SA only,console command) |
| /give weapon_zs_adminpathtool PlayerName |
Alternative way to get navmesh tool (SA only) |
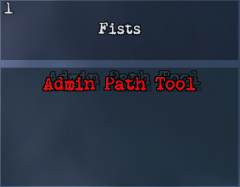
After you give yourself a navmesh tool, you may notice control tips in the upper left corner.
Disable the experience display in the options in “F4 –> Interface” to see them more correctly. If you also have spark_currency_widget 1, disable it as well.
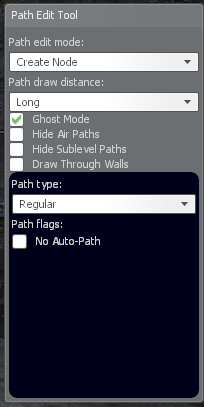
When you hold down the “Alt” key. in the lower right corner, a menu for tool control will appear. Consider this interface:
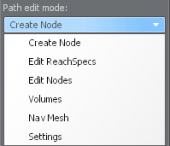
| Path edit mode | Allows you to select the navmesh type. Will be discussed in more detail below. | |
|---|---|---|
| Path draw distance | Allows you to change the display range of nodes | |
| Flags | Ghost Mode – Gives you noclip.
Hide Air Paths – Hides air nodes. Hide Sublevel Paths – Disables the visibility of nodes you cannot see. Draw Through Walls – Enables drawing nodes through walls. |
Let's consider these options in more details.
