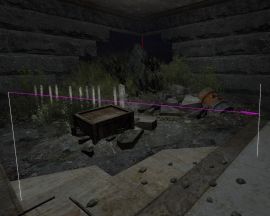
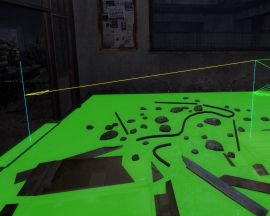
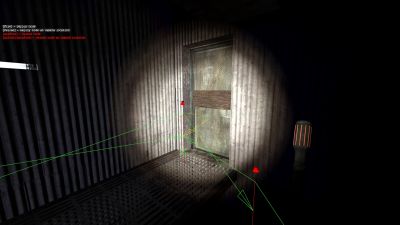
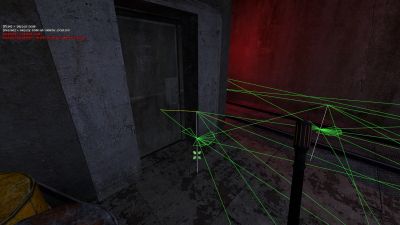
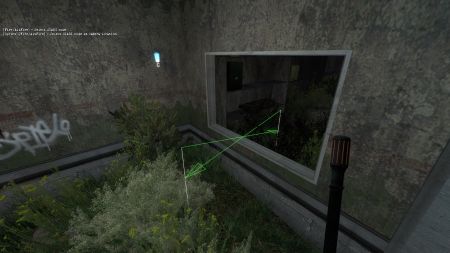
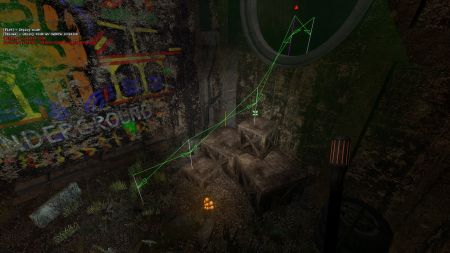
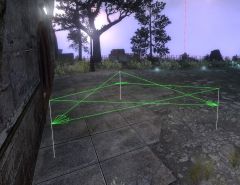
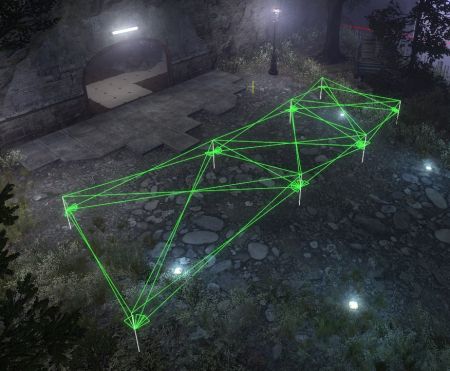
Difference between revisions of "Navmeshing"
MrDragonorg (talk | contribs) |
|||
| (13 intermediate revisions by 2 users not shown) | |||
| Line 72: | Line 72: | ||
|- style="vertical-align: center;" | |- style="vertical-align: center;" | ||
! scope="row" style="width: 13%;" | <span style="color:orange">zs_admin_purgepaths</span> | ! scope="row" style="width: 13%;" | <span style="color:orange">zs_admin_purgepaths</span> | ||
| style="padding: 0.5%;" | Completely clears navmesh (SA only,console command) | | style="padding: 0.5%;" | Completely clears navmesh (SA only, console command) | ||
|- style="vertical-align: center;" | |- style="vertical-align: center;" | ||
! scope="row" style="width: 13%;" | <span style="color:orange">/give weapon_zs_adminpathtool <br>PlayerName</span> | ! scope="row" style="width: 13%;" | <span style="color:orange">/give weapon_zs_adminpathtool <br>PlayerName</span> | ||
| style="padding: 0.5%;" | Alternative way to get navmesh tool (SA only) | | style="padding: 0.5%;" | Alternative way to get navmesh tool (SA only) | ||
|- style="vertical-align: center;" | |||
! scope="row" style="width: 13%;" | <span style="color:orange">zs_addbots</span> | |||
| style="padding: 0.5%;" | Adds a bot to server (console command) | |||
|} | |} | ||
| Line 122: | Line 125: | ||
=== <u>Create Node</u> === | === <u>Create Node</u> === | ||
This mode allows you to create nodes and select types of nodes. | This mode allows you to create nodes and select types of nodes. | ||
Options for Create Node: | <span style="color:orange"><u>'''''Control:'''''</u></span> | ||
[[File:Cratenode control.png|frameless|none|upright=2.5]] | |||
<span style="color:#00FF33">'''LMB'''</span> – Creates a node at the specified point | |||
<span style="color:red">'''RMB'''</span> – Deletes the selected node | |||
<span style="color:#00FF33">'''R'''</span> – Creates a node that is in your position | |||
<span style="color:red">'''Shift + RMB'''</span> – Removes the node that is in the position of your gaze. This is an extremely useful tool that allows you to delete nodes that you cannot direct, such as nodes in the air or underground. | |||
<span style="color:orange"><u>'''''Options for Create Node:'''''</u></span> | |||
[[File:Navmesh nodes noautopath menu.png|frameless|none|upright=2.5]] | |||
<u>'''Path type'''</u> – allows you to select the type of node you want to create | |||
<u>'''No Auto-Path'''</u> – Creates a node that will not automatically connect to other nodes | |||
=== <u>Node Types</u> === | === <u>Node Types</u> === | ||
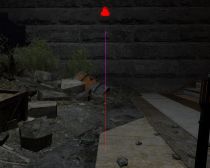
Changes the color to red for the regular node and adds a red icon on top too. For all other node types, simply has a red icon on top. | {| class="wikitable" | ||
Flying | |- style="vertical-align: center;" | ||
Ladder | ! scope="row" style="width: 13%;" | <span style="color:white">'''Regular'''</span> | ||
| style="width: 10%;" |[[File:Regularnode example.jpg|frameless|center|upright=0.7]] | |||
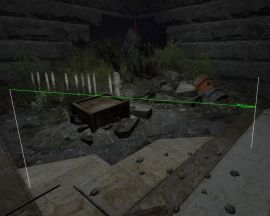
| A common node type that allows bots to walk between them and automatically connects to all visible nodes. | |||
|- style="vertical-align: center;" | |||
! scope="row" style="width: 13%;" | <span style="color:red">'''No Auto-Path'''</span> | |||
| style="width: 10%;" | [[File:Noautopathnode example.jpg|frameless|center|upright=0.7]] | |||
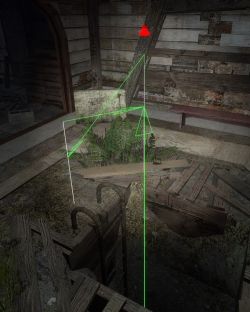
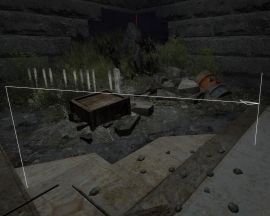
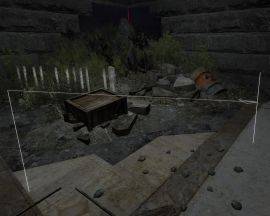
| A common node type, but <span style="color:orange"><u>'''will not automatically connect'''</u></span>. | |||
This kind of node must be connected using the ''“Edit ReachSpecs” option'', which will be discussed below. | |||
Changes the <span style="color:red">color to red</span> for the <span style="color:white">regular node</span> and <span style="color:red">adds a red icon on top</span> too. For all other node types, simply <span style="color:orange">has a red icon on top</span>. | |||
|- style="vertical-align: center;" | |||
! scope="row" style="width: 13%;" | <span style="color:#00CCFF">'''Flying'''</span> | |||
| style="width: 10%;" | [[File:Flyingnode example.jpg|frameless|center|upright=0.7]] | |||
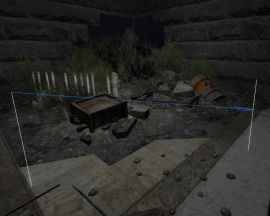
| An aerial node type that is created for flying zombie classes, such as [[Wil O' Wisp|Wisp]]. | |||
''Creates a node at your position.'' | |||
Since there are no regular flying classes on sunrust servers, creating a flying node is <u>unnecessary</u>. | |||
|- style="vertical-align: center;" | |||
! scope="row" style="width: 13%;" | <span style="color:#FF33FF">'''Ladder'''</span> | |||
| style="width: 10%;" | [[File:Laddernode example.jpg|frameless|center|upright=0.7]] | |||
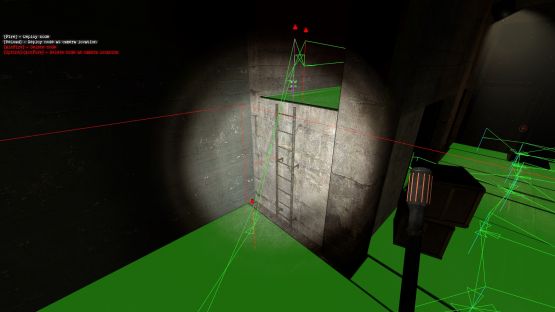
| A <span style="color:orange"><u>'''''noclip node'''''</u></span> that allows bots to fly through paths <u>in and out</u> of it. | |||
You need to be extremely careful with this type of node, since it gives "cheats" to bots for a certain segment, which may not be to the liking of players. | You need to be <span style="color:orange">extremely careful</span> with this type of node, since <span style="color:orange">it gives "cheats"</span> to bots for a certain segment, which may not be to the liking of players. | ||
This node is often useful for long ladders or ladders that are difficult for bots to climb, but it can be used for other gameplay elements as well. | This node is often useful for long ladders or ladders that are difficult for bots to climb, but it can be used for other gameplay elements as well. | ||
[[ | <u>Let's consider an example of the correct placement of nodes for correct bots work:</u> | ||
* <span style="color:white">1 regular node</span> at the bottom of the ladder | |||
* <span style="color:#FF33FF">1 ladder node</span> on top of the ladder. It can be located both on the ground or on the ladder prop itself, or in the air above the ladder case opening | |||
* <span style="color:white">1 regular node</span> on top of the ladder on the ground a little further from the ladder node. | |||
{| style="text-align: center; margin-left: auto; margin-right: auto; border: none;" | |||
!| | |||
!| | |||
|- | |||
| [[File:Correct placement ladder topnode.jpg|frameless|250px]] | |||
| [[File:Correct placement ladder bottomnode.jpg|frameless|555px]] | |||
|} | |||
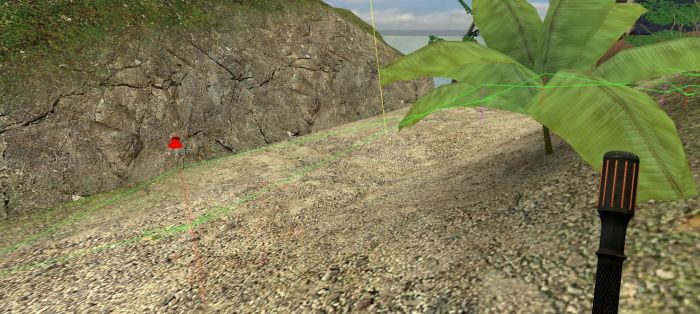
[[File:Bulb icon.png|frameless|30px]] <span style="color:orange"><u>'''Tip:'''</u></span> The “<span style="color:white"><u>regular</u></span> - <span style="color:#FF33FF"><u>ladder</u></span> - <span style="color:white"><u>regular</u></span> – <span style="color:#FF33FF"><u>ladder</u></span>” connection will '''''speed up the bots''''', so this can be used for <u>'''''speed boosts'''''</u>. | |||
But the bots will not noclip right up to you, they will stop at ~200 units and start moving to you at a normal speed due to the activation of the <span style="color:teal"><u>“pursuit mode”</u></span> (this will be discussed below). | |||
This is useful for surf parts of the map, for maps where zombies need to be extremely close to people, etc. | |||
{| style="text-align: center; margin-left: auto; margin-right: auto; border: none;" | |||
!| | |||
|- | |||
| [[File:Nodes speed boost.jpg|frameless|700px]] | |||
|} | |||
[[File:Bug icon.png|frameless|30px]] <span style="color:red"><u>'''Bug:'''</u></span> If you use this node with a <u>HL2 ladder</u>, then the <u>bot may not stop at the node, but fly to the nearest target with a noclip</u>. | |||
[[ | [[File:Bulb icon.png|frameless|30px]] <span style="color:orange"><u>'''Tip:'''</u></span> Rather than using ladder nodes for HL2 ladders, use manual nodes to prevent bots flying at end of node as noted above. | ||
This is because HL2 ladders hook you to the ladder at a certain point and you can climb towards other exit points. A bot with a ladder node doesn’t touch them (or doesn’t hit the node), so it just goes to the nearest target. | |||
'''''<u>Always check what type of ladder case you must make sure this doesn't happen!</u>''''' If this is a HL2 ladder, then either don’t use the ladder node, or use it so that the bot doesn’t get to the point where it hooks onto the ladder (i.e. as far as possible from the beginning of the ladder). | |||
|- style="vertical-align: center;" | |||
! scope="row" style="width: 13%;" | <span style="color:yellow">'''Armory Node'''</span> | |||
| style="width: 10%;" | [[File:Armorynode example.jpg|frameless|center|upright=0.7]] | |||
| Node designed for placing the armor crates on HG. | |||
[[Bug icon]] Bug: For this type of nodes only the “water path” created automatically works, and this node can only function with similar water nodes or just regular nodes. This means that you cannot add a teleport path or make a link to a ladder, the bots simply will not perceive it. To solve this problem, use regular nodes connected to the ladder, then lower the lower one into the water using “EditNodes mode” and connect it to the water node. | <u>Not used</u>, it is advisable to delete such nodes. | ||
|- style="vertical-align: center;" | |||
! scope="row" style="width: 13%;" | <span style="color:#00CC33">'''No Leave Node'''</span> | |||
| style="width: 10%;" | [[File:Noleavenode example.jpg|frameless|center|upright=0.7]] | |||
| A special node that makes <span style="color:orange"><u>bots go exactly at it or along the path from one to another</u></span>. With a regular node, bots can deviate slightly, because of which they can fall on some places. | |||
A great example is the sewers on the <u>''zs_obj_6_nights_v15''</u> map, where bots must move on small boards, causing them to fall off with regular / no auto-path nodes. | |||
{| style="text-align: center; margin-left: auto; margin-right: auto; border: none;" | |||
!| | |||
|- | |||
|[[File:Noleavenodes application.jpg|frameless|700px]] | |||
|} | |||
[[File:Bulb icon.png|frameless|30px]] <span style="color:orange"><u>'''Tip:'''</u></span> Sometimes no leave nodes can help with the pursuit mode, so the bots will function more correctly and attack the cade instead of trying to hit you through the wall. Of course, a lot of places are better fix with volumes, but that can help. | |||
{| style="text-align: center; margin-left: auto; margin-right: auto; border: none;" | |||
!| | |||
|- | |||
|[[File:Noleavenodes disable pursuit example.jpg|frameless|700px]] | |||
|} | |||
[[File:Bug icon.png|frameless|30px]] <span style="color:red"><u>'''Bug:'''</u></span> Due to the fact that no leave node forces bots to follow them exactly, sometimes bots can start spinning as if they got stuck when they hit the node, but in fact they are trying to get to it more accurately position and after a while they begin to walk normally along them. Therefore, it is not recommended to use these nodes in places of good fire angles, where they can become an easy target for survivors. | |||
|- style="vertical-align: center;" | |||
! scope="row" style="width: 13%;" | <span style="color:blue">'''Water Node'''</span> | |||
| style="width: 10%;" | [[File:Waternode example.png|frameless|center|upright=0.7]] | |||
| This node is <span style="color:orange"><u>created by placing a regular node in water</u></span>. <span style="color:orange"><u>This also works for a flying node</u></span>, which allows you to place nodes not only at the bottom, but also in the water itself. | |||
Unfortunately, these types of nodes turn out to be <u>very "dirty"</u> for the water space and rather difficult to remove, and bots are not so good at walking with them. | |||
'''I highly recommend using “areas” instead of water nodes.''' | |||
[[File:Bug icon.png|frameless|30px]] <span style="color:red"><u>'''Bug:'''</u></span> For this type of nodes <u>only the “water path” created automatically works</u>, and this node can only function with similar water nodes or just regular nodes. | |||
<span style="color:orange">This means that you cannot add a teleport path or make a link to a ladder</span>, the bots simply will not perceive it. | |||
To solve this problem, '''''use regular nodes connected to the ladder''''', then lower the lower one into the water '''<u>using “EditNodes mode”</u>''' and connect it to the water node. | |||
[[File:Bug icon.png|frameless|30px]] <span style="color:red"><u>'''Bug:'''</u></span> Sometimes with water nodes bots can float up to the ceiling, causing them to get stuck. | |||
This is very important for underwater caves like zs_obj_enervation_v22. It is recommended to use “areas” for the water. | |||
|} | |||
=== <u>Edit ReachSpecs</u> === | === <u>Edit ReachSpecs</u> === | ||
[[File:Autopaths nodes example.jpg|frameless|left]] | |||
With this mode <span style="color:orange"><u>you can change paths ("links") between nodes</u></span>. | |||
For example, you can delete the path from one node to another or completely disconnect the nodes, as a result of which the bots will either be able to go to this node, but will not be able to return, or, accordingly, will not move between these nodes at all. It also allows you to create special paths between nodes, for example, fast jump paths or teleport paths. | |||
Regular nodes automatically create paths between themselves, but sometimes they may not be correct, so this is an extremely useful tool to edit them. If there are a lot of nodes, it will often be easier to use “Create nodes + Path draw distance”. This will be discussed later. | Regular nodes automatically create paths between themselves, but sometimes they may not be correct, so this is an extremely useful tool to edit them. If there are a lot of nodes, it will often be easier to use “Create nodes + Path draw distance”. This will be discussed later. | ||
A useful example to make it easier to understand how this function works | |||
<span style="color:orange"><u>'''''Controls:'''''</u></span> | |||
[[File:Editreachspecs control.png|frameless|none|upright=2.5]] | |||
[[File:Editreachspecs selected control.png|frameless|none|upright=2.5]] | |||
<u>When choosing a node:</u> | |||
[[File:Editreachspecs node choice.jpg|frameless|left|upright=0.5]] | |||
<span style="color:#00FF33">LMB/RMB</span> – Select the node on which the green icon will appear to edit its paths. | |||
<span style="color:#00FF33">Shift + LMB/RMB</span> - Select the node that is in the position of your gaze. | |||
<u>With a selected node:</u> | |||
[[File:Editreachspecs choice 1st and 2nd nodes.jpg|frameless|left|upright=0.5]] | |||
<span style="color:#00FF33">LMB</span> – Creates a path from the node that you have selected to another node of your choice, where the node with the red icon is the one you have selected, and the node with the green one is the one you want to select | |||
<span style="color:red">RMB</span> – Deletes path from the node you have chosen to another node. | |||
<span style="color:#00FF33">Shift + LMB</span> – Creates a path from the node that you have chosen to another node of your choice, which is at the position of your gaze | |||
<span style="color:red">Shift + RMB</span> – Deletes the path from the node that you have chosen to another node, which is in the position of your gaze | |||
{| style="text-align: center; margin-left: auto; margin-right: auto; border: none;" | |||
!|<u>A useful example to make it easier to understand how this function works:</u> | |||
|- | |||
| [[File:Editreachspecs exampleingame.gif|frameless|upright=3]] | |||
|} | |||
=== <u>Path Types</u> === | === <u>Path Types</u> === | ||
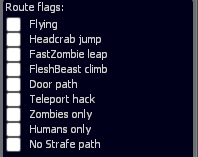
[[Bug icon]] Bug: This type of path only works with nodes and | [[File:Editreachspecs flags.png|frameless]] | ||
{| class="wikitable" | |||
|- style="vertical-align: center;" | |||
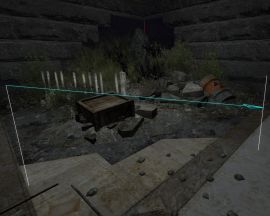
! scope="row" style="width: 13%;" | <span style="color:#00CCFF">'''Flying'''</span> | |||
| style="width: 10%;" |[[File:Flyingpath example.jpg|frameless|center|upright=0.9]] | |||
| Used for flying classes. Not needed as there are currently no flying classes for bots. | |||
|- style="vertical-align: center;" | |||
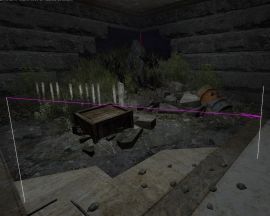
! scope="row" style="width: 13%;" | <span style="color:#FF33FF">'''Headcrab jump'''</span> | |||
| style="width: 10%;" | [[File:Headcrabpath example.jpg|frameless|center|upright=0.9]] | |||
| Used for jumping or paths where only headcrabs can go. Since bots don’t use these classes, it is not necessary to create these paths. | |||
|- style="vertical-align: center;" | |||
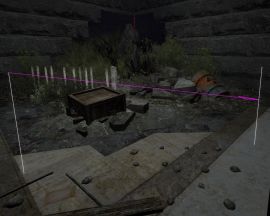
! scope="row" style="width: 13%;" | <span style="color:#FF33FF">'''FastZombie leap'''</span> | |||
| style="width: 10%;" | [[File:Fastleappath example.jpg|frameless|center|upright=0.9]] | |||
| Used for fast zombie jumps. It is not recommended to use it because bots rarely use these classes. | |||
[[File:Bug icon.png|frameless|30px]] <span style="color:red"><u>'''Bug:'''</u></span> This type of path only works with nodes and doesn't work with “areas”. On "areas" they don't try to jump, they just go forward and get stuck. | |||
[[File:Bug icon.png|frameless|30px]] <span style="color:red"><u>'''Bug:'''</u></span> Since bots can often miss the desired node, they can get stuck and this can cause a server crash! | |||
|- style="vertical-align: center;" | |||
FleshBeast climb | ! scope="row" style="width: 13%;" | <span style="color:#FF33FF">'''FleshBeast climb'''</span> | ||
Door path | | style="width: 10%;" | [[File:Fleshbeastpath example.jpg|frameless|center|upright=0.9]] | ||
| Not used. | |||
|- style="vertical-align: center;" | |||
! scope="row" style="width: 13%;" | <span style="color:yellow">'''Door path'''</span> | |||
| style="width: 10%;" | [[File:Doorpath example.jpg|frameless|center|upright=0.9]] | |||
| An extremely useful tool that detects a trigger on a door and activates this path when the trigger is enabled. It’s an indispensable tool for most obj maps. | |||
Don't confuse this with a door that opens with a button! Bots won't press the button and open that door, they just won't use it until it's open. | Let's take the <span style="color:orange">''zs_seclusion''</span> map as an example. When the board on the door is broken, the door will open, so until the trigger is activated, this path will be inactive. | ||
{| style="text-align: center; margin-left: auto; margin-right: auto; border: none;" | |||
!| | |||
!| | |||
|- | |||
| [[File:Doorpath usage blockentity example.jpg|frameless|400px]] | |||
| [[File:Doorpath usage example.jpg|frameless|400px]] | |||
|} | |||
<u>Don't confuse this with a door that opens with a button</u>! Bots won't press the button and open that door, they just won't use it until it's open. | |||
<u>This path only works with brush entities, does not work with props</u>! | |||
[[File:Bug icon.png|frameless|30px]] <span style="color:red"><u>'''Bug:'''</u></span> This path is ignored by the ladder node; bots will always use it. | |||
|- style="vertical-align: center;" | |||
! scope="row" style="width: 13%;" | <span style="color:white">'''Teleport hack'''</span> | |||
| style="width: 10%;" | [[File:Teleportpath example.jpg|frameless|center|upright=0.9]] | |||
| Used to teleport from one node to another. Not to be confused with teleports on the map! This is a very "cheating" tool, so it is recommended to use it in extreme cases. Better to use a ladder node. | |||
|- style="vertical-align: center;" | |||
! scope="row" style="width: 13%;" | <span style="color:#00CC33">'''Zombies only'''</span> | |||
| style="width: 10%;" | [[File:Zombieonlypath example.jpg|frameless|center|upright=0.9]] | |||
| Used as a regular (auto) path to connect all types of nodes. Enabled automatically. Do not need to use this flag | |||
|- style="vertical-align: center;" | |||
! scope="row" style="width: 13%;" | <span style="color:#0099FF">'''Humans only'''</span> | |||
| style="width: 10%;" | [[File:Humanpath example.jpg|frameless|center|upright=0.9]] | |||
| Used only by bots in a team of survivors. Since bots in the human team have not been added to the game, this type of node doesn’t need to be used. | |||
|- style="vertical-align: center;" | |||
! scope="row" style="width: 13%;" | <span style="color:#333333">'''No strafe path'''</span> | |||
| style="width: 10%;" | [[File:Nostafepath example.jpg|frameless|center|upright=0.9]] | |||
| It’s used to disable bhop or other similar movement on some paths. Since bhop is disabled for bots, these paths are not used. | |||
|- style="vertical-align: center;" | |||
! scope="row" style="width: 13%;" | <span style="color:blue">'''Water path'''</span> | |||
| style="width: 10%;" | [[File:Waterpath example.png|frameless|center|upright=0.9]] | |||
| Automatically created for water nodes. | |||
|} | |||
=== <u>Edit Nodes</u> === | === <u>Edit Nodes</u> === | ||
Controls: | A mode that allows you to <span style="color:orange"><u>replace a node to another location</u></span> while saving paths for it. It must be used carefully, otherwise some of the saved paths may go through the wall. | ||
<span style="color:orange"><u>'''''Controls:'''''</u></span> | |||
[[File:Editnode control.png|frameless|none|upright=2.5]] | |||
[[File:Editnode selected control.png|frameless|none|upright=2.5]] | |||
<u>Node selection:</u> | |||
<span style="color:#00FF33">'''LMB'''</span> – Select a node for replace | |||
<span style="color:#00FF33">'''R'''</span> – Select a node at the position of your gaze | |||
<u>Selected node:</u> | |||
<span style="color:#00FF33">'''LMB'''</span> – Put the node in the desired position | |||
<span style="color:#00FF33">'''R'''</span> – Put a node on your position | |||
<span style="color:red">'''RMB'''</span> – Deselect | |||
{| style="text-align: center; margin-left: auto; margin-right: auto; border: none;" | |||
!|<u>Using:</u> | |||
|- | |||
| [[File:Editnodes exampleingame.gif|frameless|upright=3]] | |||
|} | |||
=== <u>Volumes</u> === | === <u>Volumes</u> === | ||
Basically, it is very useful for placing brushes that will not let anyone pass to fix the map or fix the bots that are not working properly. The fact is, since bots automatically crouch/jump over obstacles, decorative geometry can cause disruption of their work. For example, if the ventilation has a 1-unit brush at its exit, then the bots will jump on it instead of getting into the ventilation, which will cause them to get stuck. If you put block all volume on top, then they will use ventilation correctly. However, it will not have any effect on the gameplay. It also works the other way around, when bots need to jump, they can crouch and get stuck. | [[File:Volume navmesh example.jpg|thumb|left|upright=1.73|<div style="text-align: center">Example</div>]] | ||
Allows you to <span style="color:orange"><u>'''create playerclip (invisible walls), trigger_hurts, etc. brushes'''</u></span>. An extremely useful tool when used correctly. | |||
Basically, it is <span style="color:teal">'''''very useful for placing brushes that will not let anyone pass to fix the map or fix the bots that are not working properly'''''</span>. The fact is, since bots automatically crouch/jump over obstacles, decorative geometry can cause disruption of their work. | |||
For example, if the <u>ventilation has a 1-unit brush at its exit</u>, then the bots will jump on it instead of getting into the ventilation, which will <u>cause them to get stuck</u>. If you put '''block all volume on top, then they will use ventilation correctly'''. However, it will not have any effect on the gameplay. It also works the other way around, when bots need to jump, they can crouch and get stuck. | |||
[[File:Block all.gif|frameless|right|upright=2.1]] | |||
This brush is also used to <span style="color:teal">'''''cover elements that don’t greatly affect the gameplay'''''</span>, such as <u>fences / handrails brushes, static fences / handrails props, any obstacles from static props, holes in the walls</u> (through which a normal class cannot pass), etc. This <span style="color:orange">'''can significantly fix bots pathfinding'''</span> for their correct work. | |||
This issue is due to the <span style="color:orange">'''<u>"pursuit mode"</u>'''</span>. Bots at a distance of ~ 200 units stop moving exactly along the nodes and start moving exactly behind you, repeating some of your movements. But this mode works when there are no obstacles between you and the bot, which leads to bots getting stuck in some places | |||
This issue is due to the "pursuit mode". Bots at a distance of ~ 200 units stop moving exactly along the nodes and start moving exactly behind you, repeating some of your movements. But this mode works when there are no obstacles between you and the bot, which leads to bots getting stuck in some places | |||
'''''<u>For specific examples, you can look at the maps:</u>''''' | |||
<span style="color:orange">zs_fear_nuclear</span> (the hole for crawlers/headcrabs does not work correctly), | |||
<span style="color:orange">zs_obj_day_zero_v16</span> (the final part broke bots targeting because of fences and bad brush building), | |||
<span style="color:orange">zs_obj_filth_v19</span> (too many changes due to not using playerclip on the map itself), | |||
Volumes types: | <span style="color:orange">zs_detriot_skylines_v1</span> (due to the fact that there was no playerclip on the brush fences, bots tried to go through walls with pursuit mode) | ||
[[File:Volume using 1.jpg|frameless|center|upright=2.3]] | |||
<span style="color:orange"><u>'''''Controls:'''''</u></span> | |||
[[File:Volumes control.png|frameless|none|upright=2.5]] | |||
[[File:Volumes selected control.png|frameless|none|upright=2.5]] | |||
<u>General:</u> | |||
<span style="color:#00FF33">'''LMB'''</span> - Create Brush | |||
<span style="color:red">'''R'''</span> - Remove brush | |||
<u>When creating a brush:</u> | |||
<span style="color:#00FF33">'''LMB'''</span> - put the end point of the brush | |||
<span style="color:#00FF33">'''Shift + LMB'''</span> - put the end point of the brush at your position | |||
<span style="color:red">'''RMB'''</span> - Cancel Creation | |||
[[File:Bug icon.png|frameless|30px]] <span style="color:red"><u>'''Bug:'''</u></span> The brush after creation turns out to be a little larger than you want to create, so initially take a smaller area so that you get a smooth geometry! | |||
[[File:Bug icon.png|frameless|30px]] <span style="color:red"><u>'''Bug:'''</u></span> If you are a mapper use playerclip on stairs, especially if you can shoot or hit through them! This breaks the bots targeting, and they start to malfunction. | |||
<span style="color:orange"><u>'''''Volumes types:'''''</u></span> | |||
[[File:Volumes types.png|frameless|left|upright=0.8]] | |||
The names speak for themselves what and how each type does. | The names speak for themselves what and how each type does. | ||
=== <u>Nav Mesh</u> === | === <u>Nav Mesh</u> === | ||
[[File:Navmesh area example.jpg|frameless|left|upright=0.8]] | |||
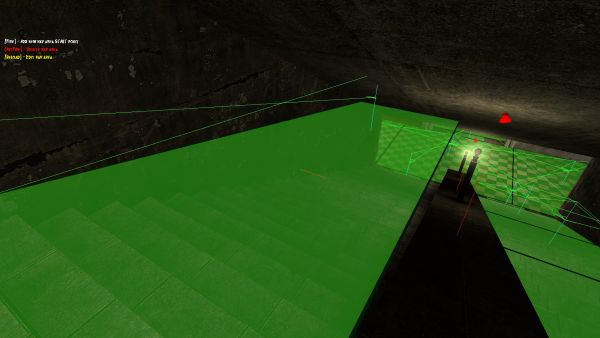
<span style="color:orange"><u>'''Allows you to create and edit "areas"'''</u></span> - a special type of navmesh that is fundamentally different from nodes. Instead of placing multiple nodes in a room, you select space for the bots to navigate. | |||
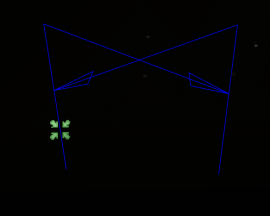
[[File:Areas work essence.png|thumb|right|upright=1.3|<div style="text-align: right"><u>Sketch how the areas works</u></div>]] | |||
The navmesh made with <span style="color:teal">'''''areas is much more optimized and improves server performance'''''</span> but <u>''takes much more time to create''</u>. It is often combined with nodes, because <span style="color:teal">'''nodes are a priority for bots'''</span> and can be used to manage them more efficiently. | |||
MarcoBots areas <u>'''''work differently from D3Bots'''''</u>, in fact, an area is a kind of nodes. Look at the picture for a better understanding of how areas work. | |||
<span style="color:orange"><u>'''''Controls:'''''</u></span> | |||
[[File:Navmesh areas control.png|frameless|none|upright=2.5]] | |||
[[File:Navmesh areas selected control.png|frameless|none|upright=2.5]] | |||
<u>Basic:</u> | |||
Auto-Generate NavMesh - Not working and not used. | <span style="color:#00FF33">'''LMB'''</span> - Add area start point | ||
Navigate a nav area - Not used | <span style="color:red">'''RMB'''</span> - Delete area | ||
Use Triangle Mesh - Allows you to create a triangular area in the form of an isosceles right triangle (square truncated diagonally) | <span style="color:yellow">'''R'''</span> – Resizes an area | ||
<u>When the first point of the area is set:</u> | |||
<span style="color:#00FF33">'''LMB'''</span> - Set the end point of the area | |||
<span style="color:red">'''RMB'''</span> - Delete start point | |||
<span style="color:orange"><u>'''''Flags:'''''</u></span> | |||
[[File:Navmesh areas triangle flag.png|frameless|left|upright=2.5]] [[File:Triangle area example.jpg|thumb|right|upright=0.6|<div style="text-align: right">Triangle Area example</div>]] | |||
<span style="color:teal">'''''Auto-Generate NavMesh'''''</span> - Not working and not used. | |||
<span style="color:teal">'''''Navigate a nav area'''''</span> - Not used | |||
<span style="color:teal">'''''Use Triangle Mesh'''''</span> - Allows you to create a triangular area in the form of an isosceles right triangle (square truncated diagonally) | |||
{| style="text-align: center; margin-left: auto; margin-right: auto; border: none;" | |||
! colspan=2 |<u>Some materials to help you better understand how areas are created:</u> | |||
!| | |||
|- | |||
| [[File:Navmesh areas creation ingame.gif|frameless|upright=3]] | |||
| [[File:Triangle areas creation ingame.gif|frameless|upright=3]] | |||
|} | |||
<span style="color:orange">'''More specific examples of creating navmesh using areas will be described below.'''</span> | |||
=== <u>Settings</u> === | === <u>Settings</u> === | ||
Used only by developers or SA. | Used only by developers or SA. | ||
== Path Draw Distance == | == Path Draw Distance == | ||
[[File:Path draw distance menu.png|frameless|left|upright=0.8]] | |||
An extremely useful tool that <span style="color:orange">'''allows you to change the drawing distance of the navmesh'''</span>. | |||
This can often help to <span style="color:teal">'''''find where some paths are going by setting the range to “short”'''''</span>; so that in some places the <span style="color:teal">'''''whole view does not turn into spaghetti'''''</span>; so that you can <span style="color:teal">'''''take the final navmesh photo'''''</span>. | |||
Draw range also has a big impact on your fps. | |||
{| style="text-align: center; margin-left: auto; margin-right: auto; border: none;" | |||
!|<u>Look at this example to better understand how draw range can be used effectively:</u> | |||
|- | |||
| [[File:Use draw distance changes to viewanddelete paths.gif|frameless|upright=3]] | |||
|} | |||
== Navmeshing with nodes== | == Navmeshing with nodes== | ||
Consider navmesh for staircases. It is enough to put just a few nodes for the bots to work correctly. You don't need to put one node for each step. Overall, this simple example shows that giving bots more freedom to overcome obstacles automatically will perform much better. | Navmeshing with <span style="color:orange">'''nodes is the simplest and fastest navmeshing method'''</span>. This method is often temporary till an area mesh is created, but the principles discussed in this heading will form <span style="color:teal"><u>'''''the basis of any navmeshing method'''''</u></span>. | ||
[[File:Correct distance for put nodes.gif|thumb|left|upright=1.5|<div style="text-align: right"><u>The minimum amount of nodes</u></div>]] | |||
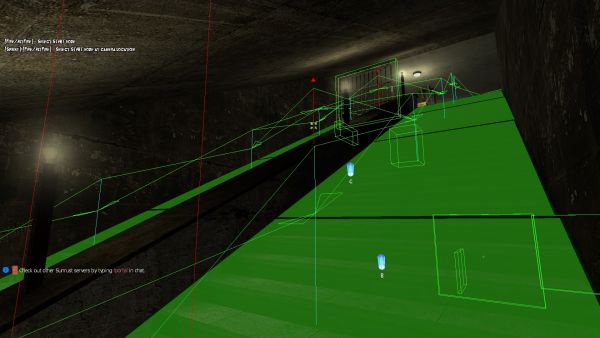
To create navmesh with nodes, you <u>'''''need to use the edit mode "Create node" and "Edit ReachSpecs"'''''</u>. The nodes will automatically connect to each other if you place regular nodes. The <span style="color:red">red cube</span> from each node will <span style="color:teal">show the maximum distance at which the bot can detect you</span>. But the fact that the distance is quite large doesn’t mean that you only need to place a couple of nodes on the map and your navmesh will be ready. <span style="color:orange">'''You need to put the required number of nodes so that the bots can move freely around the map when they are not in "pursuit mode".'''</span> | |||
[[File:Correct stair node example.jpg|thumb|right|upright=0.63|<div style="text-align: right"><u>Correct</u></div>]] | |||
[[File:Wrong stair example.jpg|thumb|right|upright=0.63|<div style="text-align: right"><u>Wrong</u></div>]] | |||
<span style="color:orange">'''<u>Consider navmesh for staircases</u>'''</span>. It is enough to <span style="color:teal">'''''put just a few nodes'''''</span> for the bots to work correctly. You don't need to put one node for each step. | |||
<u>Overall, this simple example shows that giving bots more freedom to overcome obstacles automatically will perform much better.</u> | |||
<span style="color:orange">'''<u>Now let's look at how to work with windows</u>'''</span>. The best way is to '''place one node near the window and one on the other side'''. Bots will treat the window as an obstacle to jump over, instead of jumping onto the node on the window. <u>That is, the less you control bots, the better they will work</u>. | |||
[[File:Correct windows nodeplacement example.jpg|frameless|none|upright=1.5]] | |||
<span style="color:orange">'''<u>Consider boxes as a final example</u>'''</span>. The principle of working is practically the same as for the stairs, but the “steps” have become larger. | |||
[[File:Correct crates nodeplacement example.jpg|frameless|none|upright=1.5]] | |||
[[File:Node near the wall.jpg|frameless|left|upright=0.8]] | |||
[[File:Bulb icon.png|frameless|30px]] <span style="color:orange"><u>'''Tip:'''</u></span> '''Don't place your nodes close to vertical surfaces like walls'''. If the node is close to the wall, then the <u>'''bot next to these nodes will crouch'''</u>! Bots will be an easy target for shooting. | |||
[[ | |||
[[File:Bulb icon.png|frameless|30px]] <span style="color:orange"><u>'''Tip:'''</u></span> Each node that '''connects automatically can be easily disconnected''', because <span style="color:teal"><u>'''''if you put another automatic regular node in front of this node in the direction of the path, then the paths switch to it'''''</u></span>. | |||
Let's create two stripes of nodes. Let's place auto regular nodes. | Let's create two stripes of nodes. Let's place auto regular nodes. | ||
[[File:Navmesh 2 lines of nodes connect.jpg|frameless|none|upright=1.5]] | |||
Now disconnect them using other nodes. Let's place a lot of auto regular nodes in the center and delete them. As a result, we will get 2 lines of nodes that will not be connected. | Now disconnect them using other nodes. Let's place a lot of auto regular nodes in the center and delete them. As a result, we will get 2 lines of nodes that will not be connected. | ||
[[File:Navmesh 2 lines of nodes unconnect.jpg|frameless|none|upright=1.5]] | |||
{| style="text-align: center; margin-left: auto; margin-right: auto; border: none;" | |||
!|<u>Example in GIF for better understanding:</u> | |||
|- | |||
| [[File:Crate 2 lines of nodes unconnected ingame.gif|frameless|upright=3]] | |||
|} | |||
Now, let's say we need to disconnect some node or line of nodes from others. We use the same example described above | Now, let's say we need to disconnect some node or line of nodes from others. We use the same example described above | ||
[[File:Navmesh node need unconnect.jpg|frameless|none|upright=1.5]] | |||
By adding a couple of nodes in front and deleting them, we can easily detach what we need | By adding a couple of nodes in front and deleting them, we can easily detach what we need | ||
[[File:Navmesh line of nodes manynodes unconnect.jpg |frameless|none|upright=1.5]] | |||
With this tip, you can very quickly delete paths, almost without resorting to using the Edit ReachSpecs mode, without connecting/disconnecting each node one by one. If you think the auto-mode is "disgusting" and impossible to keep track of, then this tip and Path Draw Distance completely solve this problem and significantly speed up the process of creating a navmesh. | {| style="text-align: center; margin-left: auto; margin-right: auto; border: none;" | ||
!|<u>GIF example:</u> | |||
|- | |||
| [[File:Crate line of nodes unconnected ingame.gif|frameless|upright=3]] | |||
|} | |||
With this tip, <span style="color:orange">'''you can very quickly delete auto paths'''</span>, almost without resorting to using the Edit ReachSpecs mode, without connecting / disconnecting each node one by one. | |||
If you think the auto-mode is "disgusting" and impossible to keep track of, then <span style="color:teal">'''''this tip and Path Draw Distance completely solve this problem and significantly speed up the process of creating a navmesh.'''''</span> | |||
== Navmeshing with areas == | == Navmeshing with areas == | ||
It is important to understand that nodes and areas differ not only in the way they create navigation. Nodes are a priority for bots, so they will choose a node path rather than another. This can often lead to issues when bots will walk on the same nodes indefinitely. Also, the ability to jump over doesn’t work for areas (i.e. bots will not jump from one roof to another, etc.), and the fast paths also don’t work. Therefore, you need to combine nodes and areas for a good navmesh. | '''<u>Navmeshing with areas uses the same rules as node navmeshing, except that you have areas instead of nodes. You should select an area where bots can find you.</u>''' | ||
[[File:Correct areas ladder example.jpg|thumb|left|upright=1.8|<div style="text-align: right">An example of using nodes for a ladder case with areas</div>]] | |||
It is important to understand that <u>''nodes and areas differ not only in the way they create navigation''</u>. <span style="color:teal">'''Nodes are a priority for bots'''</span>, so they will choose a node path rather than another. | |||
This can often lead to issues when bots will walk on the same nodes indefinitely. Also, the ability to <span style="color:teal"><u>jump over doesn’t work for areas</u></span> (i.e. bots will not jump from one roof to another, etc.), and the <span style="color:teal"><u>fast paths also don’t work</u></span>. <span style="color:orange">'''<u>Therefore, you need to combine nodes and areas for a good navmesh.</u>'''</span> | |||
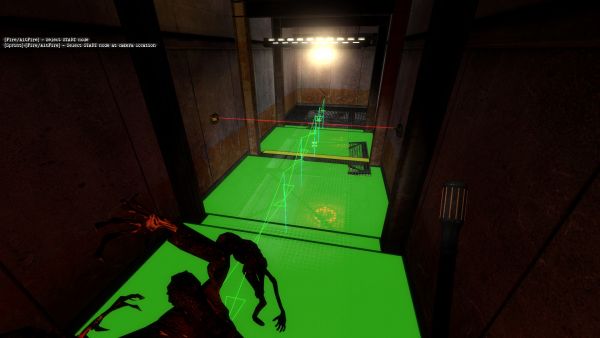
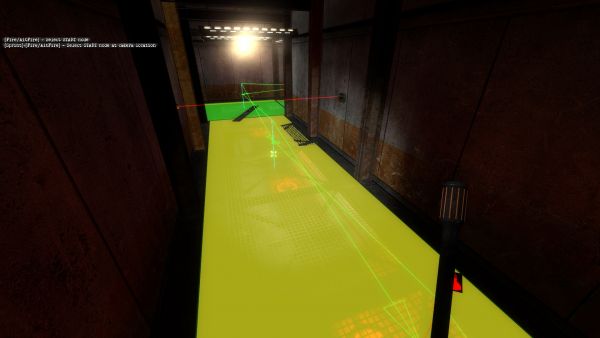
<u>'''The areas must be connected to each other'''</u>. This means that to connect several areas, you need to create a small area in the doorway, etc., or use the method of nodes, connecting them with areas. If areas are much higher in relation to other areas (<span style="color:teal">'''roofs areas'''</span>), then they need to be connected to more distant areas so that the bots can jump much faster. | |||
[[File:Areas shouldbe on any entrance.jpg|frameless|none|upright=1.5]] | |||
{| style="text-align: center; margin-left: auto; margin-right: auto; border: none;" | |||
! colspan=2 |<u>This is very important as it can lead to incorrect pathfinding for bots. Let's take this example:</u> | |||
!| | |||
|- | |||
| [[File:Areas connecting wrong.jpg|thumb|upright=2|<div style="text-align: center"><span style="color:red"><u>'''Wrong'''</u></span></div>]] | |||
| [[File:Areas connecting correct.jpg|thumb|upright=2|<div style="text-align: center"><span style="color:#00FF33"><u>'''Correct'''</u></span></div>]] | |||
|} | |||
[[File:Correct entrance example.jpg|frameless|left|upright=0.8]] | |||
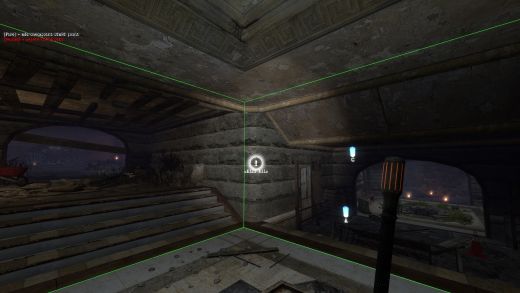
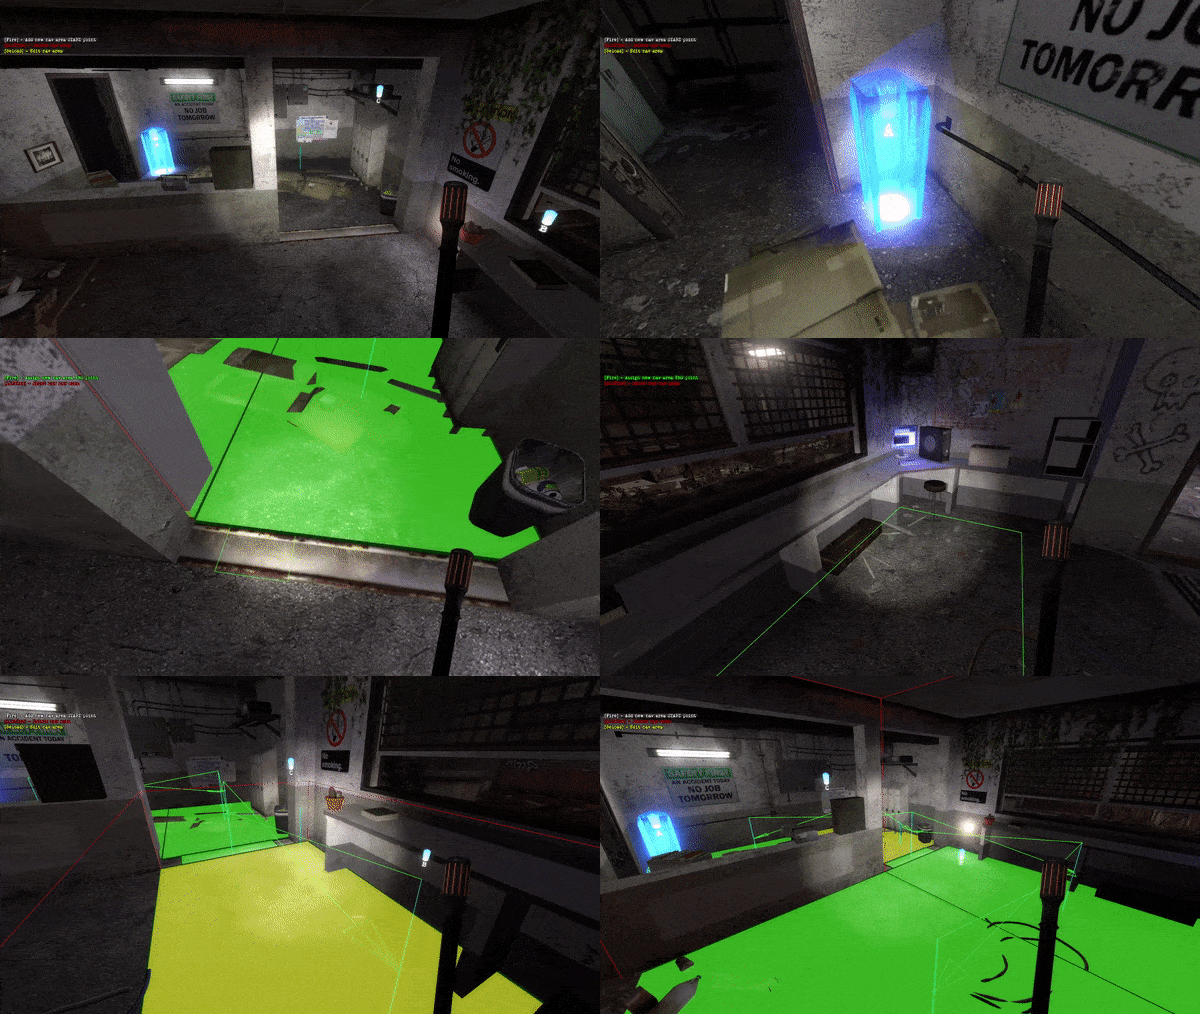
[[File:Bulb icon.png|frameless|30px]] <span style="color:orange"><u>'''Tip:'''</u></span> When creating areas in entrances, it’s much better to create an <span style="color:teal">'''area slightly smaller than the entrance itself'''</span>. Bots will get stuck less in front of the entrance and will move closer to the entrance center. | |||
When creating areas on displacements, you need to be extremely careful, as geometry can often be quite tortuous, even if it does not seem so at first glance. It is recommended to create smaller areas so that they can approximate the displacement. | [[File:Good example for areas creation.gif|frameless|right|upright=2]] | ||
[[File:Bulb icon.png|frameless|30px]] <span style="color:orange"><u>'''Tip:'''</u></span> Areas are easiest to create "from the corner", this will make it easier to find the area boundaries. | |||
When creating areas on <span style="color:orange">'''complex geometry'''</span>, such as <span style="color:teal">''circular and semicircular surfaces, complex surfaces with many props, rooms with many decorative elements, etc.''</span>, you need to understand that <u>'''you don’t need to mesh everything with detailed precision or don’t mesh something at all'''</u>. You will be in one of the other areas, so it makes no sense to create it on small ledges, this will simplify navmesh several times | |||
{| style="text-align: center; margin-left: auto; margin-right: auto; border: none;" | |||
! colspan=2 |<u>Example of decorative beams on the walls:</u> | |||
!| | |||
|- | |||
| [[File:Wrong example areas 1.jpg|thumb|upright=2|<div style="text-align: center"><span style="color:red"><u>'''Wrong'''</u></span></div>]] | |||
| [[File:Correct example areas 1.jpg|thumb|upright=2|<div style="text-align: center"><span style="color:#00FF33"><u>'''Correct'''</u></span></div>]] | |||
|} | |||
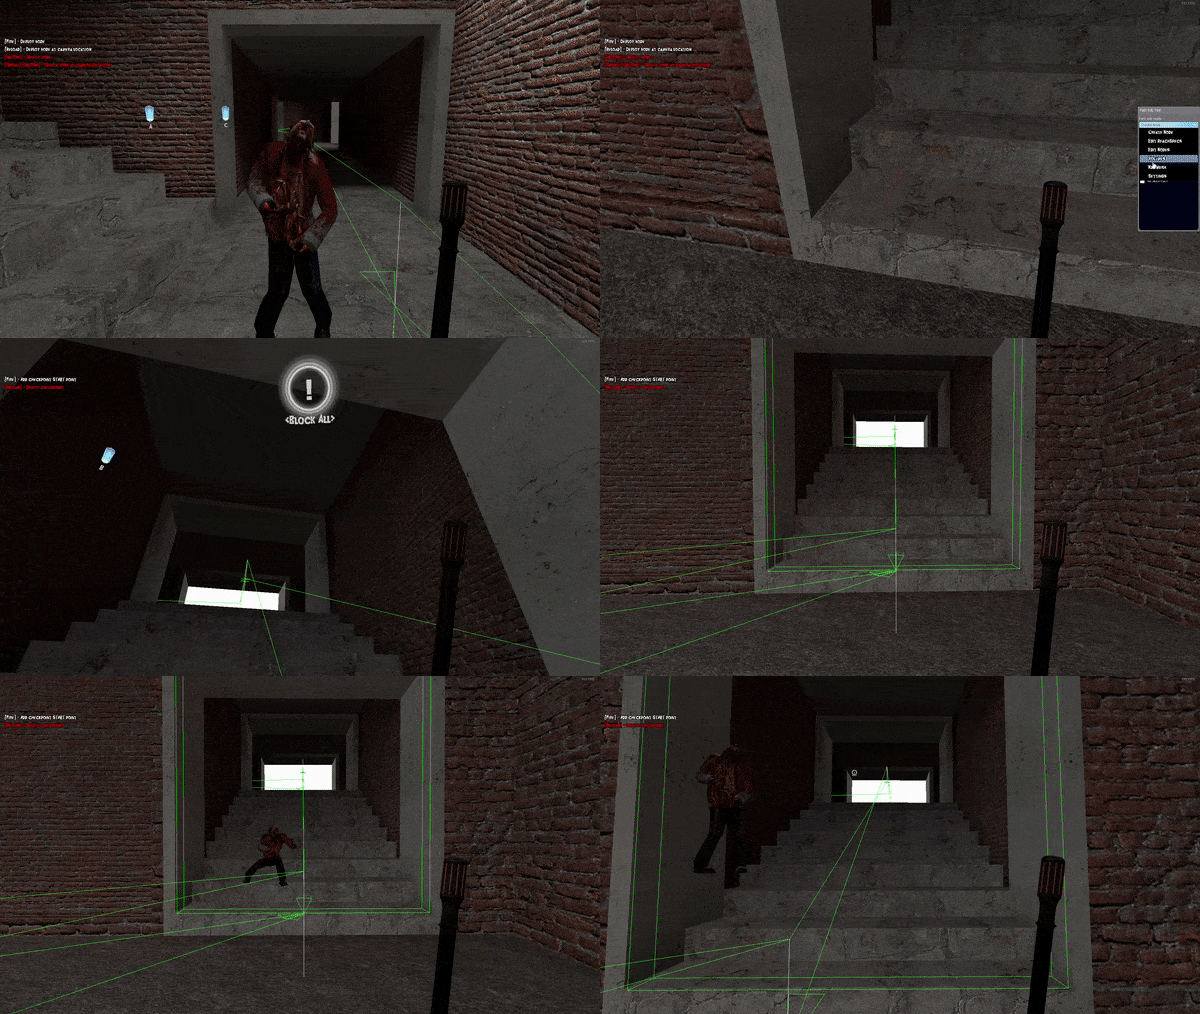
[[File:Bulb icon.png|frameless|30px]] <span style="color:orange"><u>'''Tip:'''</u></span> For long staircases, it is a good idea to divide the area into several so that the areas correctly cover the surface! Also beware of the long staircase that have a ceiling. | |||
{| style="text-align: center; margin-left: auto; margin-right: auto; border: none;" | |||
! colspan=2 |<u>Example of Long Staircase Mesh with Ceiling:</u> | |||
!| | |||
|- | |||
| [[File:Stairmeshdivided.jpg|thumb|upright=2|<div style="text-align: center"><span style="color:#00FF33"><u>'''Divided'''</u></span></div>]] | |||
| [[File:Stairnotdivided.jpg|thumb|upright=2|<div style="text-align: center"><span style="color:red"><u>'''Not Divided'''</u></span></div>]] | |||
|} | |||
{| style="text-align: center; margin-left: auto; margin-right: auto; border: none;" | |||
!|<u>Example for complex surfaces:</u> | |||
|- | |||
| [[File:Multiefaceted entrance example.jpg|frameless|upright=3]] | |||
|} | |||
{| style="text-align: center; margin-left: auto; margin-right: auto; border: none;" | |||
! colspan=2 |<u>For props, it’s much better to use nodes instead of creating multiple areas there:</u> | |||
!| | |||
|- | |||
| [[File:Correct placement nodes to areas crates.jpg|frameless|upright=2]] | |||
| [[File:Correct placement nodes to areas crates withoutnodeonmiddle.jpg|frameless|upright=2]] | |||
|} | |||
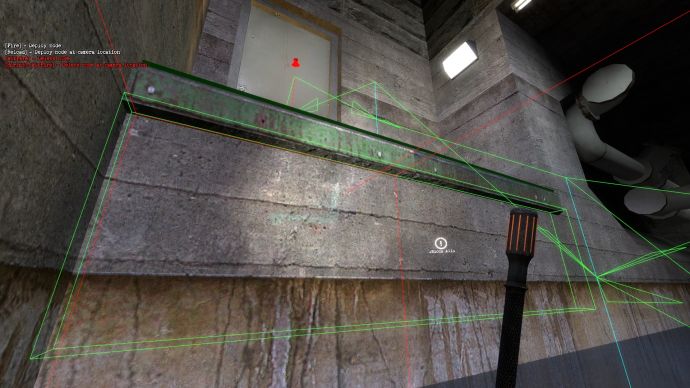
[[File:Bulb icon.png|frameless|30px]] <span style="color:orange"><u>'''Tip:'''</u></span> You can create areas underneath static props that you can jump over. '''Be careful with brush entities''', as they may incorrectly create a detection area (<span style="color:red">red cube</span>) | |||
[[File:Bulb icon.png|frameless|30px]] <span style="color:orange"><u>'''Tip:'''</u></span> When creating nodes to fall, put a no leave node in the air and put a regular node on the area. Connect them | |||
{| style="text-align: center; margin-left: auto; margin-right: auto; border: none;" | |||
! colspan=2 | | |||
!| | |||
|- | |||
| [[File:Correct example for path to falloff into hole.jpg|frameless|upright=2]] | |||
| [[File:Correct example for path to falloff into hole lesserhole.png|frameless|upright=2]] | |||
|} | |||
[[File:Always check how areas connected.jpg|frameless|left|upright=1.6]] | |||
[[File:Bug icon.png|frameless|30px]] <span style="color:red"><u>'''Bug:'''</u></span> '''Areas can automatically connect through thin walls or through props'''. Watch how they connect! | |||
[[File:Navmesh areas on displacements example.jpg|frameless|right|upright=1.3]] | |||
<span style="color:orange">'''<u>When creating areas on displacements</u>'''</span>, you need to be extremely careful, as geometry can often be quite tortuous, even if it does not seem so at first glance. <span style="color:teal">''It is recommended to create smaller areas so that they can approximate the displacement.''</span> | |||
Triangle areas are an extremely useful tool for creating areas on displacements. Consider this example: | |||
[[File:Displacement areas example 1 no areas.jpg|frameless|none|upright=3]] | |||
{| style="text-align: center; margin-left: auto; margin-right: auto; border: none;" | |||
! colspan=2 | <u>Here is a "pit" that goes down from all sides, so it would be much better to use triangular areas:</u> | |||
!| | |||
|- | |||
| [[File:Displacement areas example 1.jpg|frameless|upright=2]] | |||
| [[File:Displacement areas example 1 drawing through walls.jpg|frameless|upright=2]] | |||
|} | |||
Let's look at another example. Here is a slide that rises to the wall. | Let's look at another example. Here is a slide that rises to the wall. | ||
[[File:Displacement areas example 2 no areas.jpg|frameless|none|upright=3]] | |||
{| style="text-align: center; margin-left: auto; margin-right: auto; border: none;" | |||
! colspan=2 | <u>When using triangular areas, here we get:</u> | |||
!| | |||
|- | |||
| [[File:Displacement areas example 2.jpg|frameless|upright=2]] | |||
| [[File:Displacement areas example 2 drawing through walls.jpg|frameless|upright=2]] | |||
|} | |||
[[File:Good example for triangle areas uses.png|frameless|left|upright=1.5]] | |||
[[File:Bulb icon.png|frameless|30px]] <span style="color:orange"><u>'''Tip:'''</u></span> Triangle Areas are a very useful tool to create nice areas for almost any surface | |||
[[File:Water areas example.png|frameless|left|upright=1.5]] | |||
[[File:Bulb icon.png|frameless|30px]] <span style="color:orange"><u>'''Tip:'''</u></span> Bots work much better underwater with areas than with water nodes. Try to make areas for underwater surfaces! | |||
== [[File:Youtube icon.png|frameless|45px]] YouTube videos == | == [[File:Youtube icon.png|frameless|45px]] YouTube videos == | ||
https://youtu.be/LLGLuRNalYE - | https://youtu.be/LLGLuRNalYE - Area navmeshing | ||
https://youtu.be/82vNoRpGTCs - Area navmeshing | |||
https://youtu.be/eZBzQmPOGA4 - Area navmeshing remake | |||
== [[File:User icon.png|frameless|45px]] Credits == | |||
[https://steamcommunity.com/profiles/76561198255867910/ MrDragonorg] - creator and editor of this article. | |||
; Special thanks to | |||
: [http://steamcommunity.com/profiles/76561198399624712/ Sakura] for helping fix, edit and create a video with creating navmeshes. | |||
__NOEDITSECTION__ | __NOEDITSECTION__ | ||
Latest revision as of 03:36, 6 April 2022
Navmeshing – the process of creating navigation for bots, or more simply, creating paths so that bots can work correctly on a given map. There are many different types of bots that are used for the zs gamemode: AzBots, D3Bots, MarcoBots, etc.
MarcoBots are currently used on Sunrust servers. MarcoBots are not open-source bots, they are private and exclusive type of bots and you cannot download them for your single player. Therefore, the navmesh creation takes place on a dedicated server (or directly in the main server itself).
The advantages of MarcoBots is the simplicity navmesh creation, the automation of many bot actions, since you don’t need to specify when they need to jump or crouch, and a huge level of optimization, as a result these bot load server much less and this leads to less lags.
The better navmesh is created, the more powerful the bots will be, since they will know how to act in each area of the map. A good navmesh also affects the optimization, server network and is especially necessary for the correct work of Great Evils - exclusive zombie boss classes only for bots.
Terminology
| Navmesh (abbreviated "mesh") |
Navigation for bots. |
|---|---|
| Navmeshing | The process of creating navigation for bots. |
| Nodes | Points between which bots move and where they can find you. |
| Paths (or "links") |
Connections between nodes that allow or not move between specific nodes. |
| Areas | A special type of bot navigation that differs from nodes. Instead of nodes, you select the required area and the bot can find you if you are in it. Will be discussed this type of navigation in more detail below. |
| Targeting | A bot pathfinding for the closest or highest priority target. |
| Pursuit mode | The bot stops moving on the nodes and starts moving exactly behind you, is activated for ~200 units. |
Required commands and control
To be able to create navmesh, you need to be granted access to a dedicated navmesh server. Contact Scott to have access to dev server: Scott#3224. After obtaining the necessary rights, you can connect to it and begin to create navmesh.
Dev Server IP: 104.194.10.86:27020
Next, you need to get the navmesh tool and start creating the navmesh. Let's look at the required commands for this:
| /navmeshtool | Gives you a navmesh tool |
|---|---|
| /startmeshing | Gives you a navmesh tool, god mode and an infinite wave time |
| /changemapnavmesh mapname |
Allows you to change the map on server |
| zs_admin_purgepaths | Completely clears navmesh (SA only, console command) |
| /give weapon_zs_adminpathtool PlayerName |
Alternative way to get navmesh tool (SA only) |
| zs_addbots | Adds a bot to server (console command) |
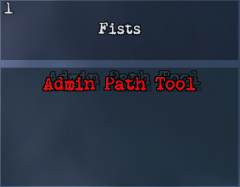
After you give yourself a navmesh tool, you may notice control tips in the upper left corner.
Disable the experience display in the options in “F4 –> Interface” to see them more correctly. If you also have spark_currency_widget 1, disable it as well.
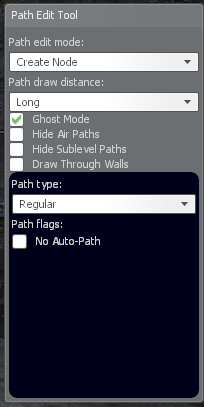
When you hold down the “Alt” key. in the lower right corner, a menu for tool control will appear. Consider this interface:
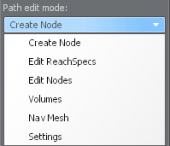
| Path edit mode | Allows you to select the navmesh type. Will be discussed in more detail below. | |
|---|---|---|
| Path draw distance | Allows you to change the display range of nodes | |
| Flags | Ghost Mode – Gives you noclip.
Hide Air Paths – Hides air nodes. Hide Sublevel Paths – Disables the visibility of nodes you cannot see. Draw Through Walls – Enables drawing nodes through walls. |
Let's consider these options in more details.
Path edit mode
Create Node
This mode allows you to create nodes and select types of nodes.
Control:
LMB – Creates a node at the specified point
RMB – Deletes the selected node
R – Creates a node that is in your position
Shift + RMB – Removes the node that is in the position of your gaze. This is an extremely useful tool that allows you to delete nodes that you cannot direct, such as nodes in the air or underground.
Options for Create Node:
Path type – allows you to select the type of node you want to create

No Auto-Path – Creates a node that will not automatically connect to other nodes
Node Types
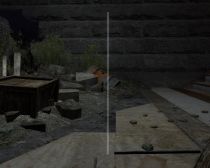
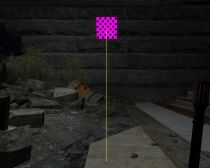
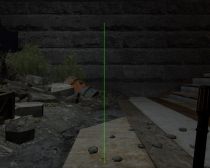
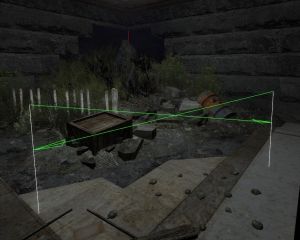
| Regular | A common node type that allows bots to walk between them and automatically connects to all visible nodes. | |||||||
|---|---|---|---|---|---|---|---|---|
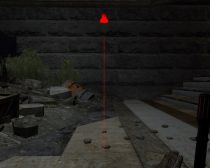
| No Auto-Path | A common node type, but will not automatically connect.
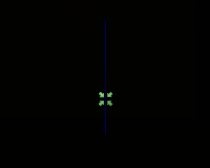
This kind of node must be connected using the “Edit ReachSpecs” option, which will be discussed below. Changes the color to red for the regular node and adds a red icon on top too. For all other node types, simply has a red icon on top. | |||||||
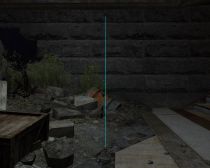
| Flying | An aerial node type that is created for flying zombie classes, such as Wisp.
Creates a node at your position. Since there are no regular flying classes on sunrust servers, creating a flying node is unnecessary. | |||||||
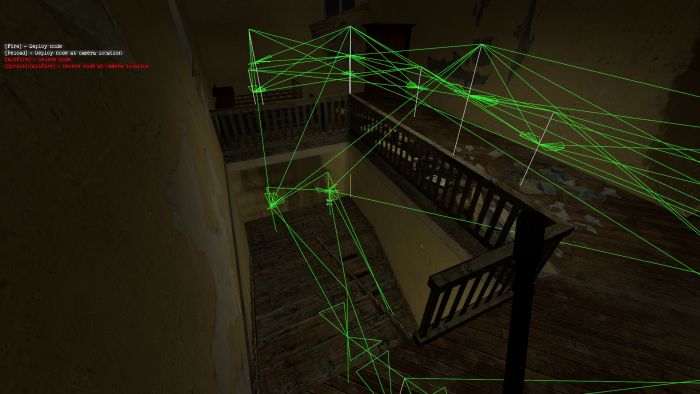
| Ladder | A noclip node that allows bots to fly through paths in and out of it.
You need to be extremely careful with this type of node, since it gives "cheats" to bots for a certain segment, which may not be to the liking of players. This node is often useful for long ladders or ladders that are difficult for bots to climb, but it can be used for other gameplay elements as well.
Let's consider an example of the correct placement of nodes for correct bots work:
But the bots will not noclip right up to you, they will stop at ~200 units and start moving to you at a normal speed due to the activation of the “pursuit mode” (this will be discussed below). This is useful for surf parts of the map, for maps where zombies need to be extremely close to people, etc.
This is because HL2 ladders hook you to the ladder at a certain point and you can climb towards other exit points. A bot with a ladder node doesn’t touch them (or doesn’t hit the node), so it just goes to the nearest target. Always check what type of ladder case you must make sure this doesn't happen! If this is a HL2 ladder, then either don’t use the ladder node, or use it so that the bot doesn’t get to the point where it hooks onto the ladder (i.e. as far as possible from the beginning of the ladder). | |||||||
| Armory Node | Node designed for placing the armor crates on HG.
Not used, it is advisable to delete such nodes. | |||||||
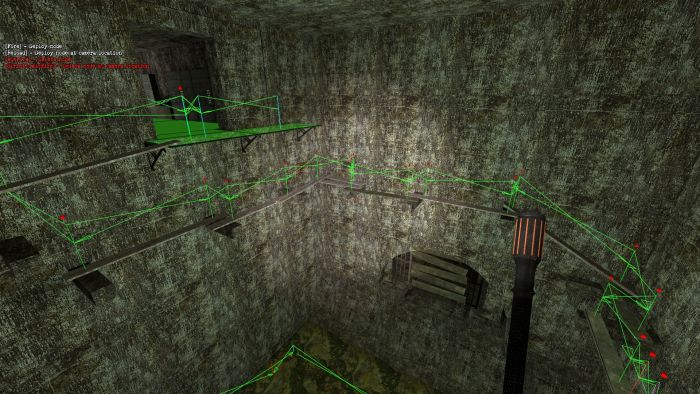
| No Leave Node | A special node that makes bots go exactly at it or along the path from one to another. With a regular node, bots can deviate slightly, because of which they can fall on some places.
A great example is the sewers on the zs_obj_6_nights_v15 map, where bots must move on small boards, causing them to fall off with regular / no auto-path nodes.
| |||||||
| Water Node | This node is created by placing a regular node in water. This also works for a flying node, which allows you to place nodes not only at the bottom, but also in the water itself.
Unfortunately, these types of nodes turn out to be very "dirty" for the water space and rather difficult to remove, and bots are not so good at walking with them. I highly recommend using “areas” instead of water nodes.
This means that you cannot add a teleport path or make a link to a ladder, the bots simply will not perceive it. To solve this problem, use regular nodes connected to the ladder, then lower the lower one into the water using “EditNodes mode” and connect it to the water node.
This is very important for underwater caves like zs_obj_enervation_v22. It is recommended to use “areas” for the water. |
Edit ReachSpecs
With this mode you can change paths ("links") between nodes.
For example, you can delete the path from one node to another or completely disconnect the nodes, as a result of which the bots will either be able to go to this node, but will not be able to return, or, accordingly, will not move between these nodes at all. It also allows you to create special paths between nodes, for example, fast jump paths or teleport paths.
Regular nodes automatically create paths between themselves, but sometimes they may not be correct, so this is an extremely useful tool to edit them. If there are a lot of nodes, it will often be easier to use “Create nodes + Path draw distance”. This will be discussed later.
Controls:
When choosing a node:
LMB/RMB – Select the node on which the green icon will appear to edit its paths.
Shift + LMB/RMB - Select the node that is in the position of your gaze.
With a selected node:
LMB – Creates a path from the node that you have selected to another node of your choice, where the node with the red icon is the one you have selected, and the node with the green one is the one you want to select
RMB – Deletes path from the node you have chosen to another node.
Shift + LMB – Creates a path from the node that you have chosen to another node of your choice, which is at the position of your gaze
Shift + RMB – Deletes the path from the node that you have chosen to another node, which is in the position of your gaze
| A useful example to make it easier to understand how this function works: |
|---|
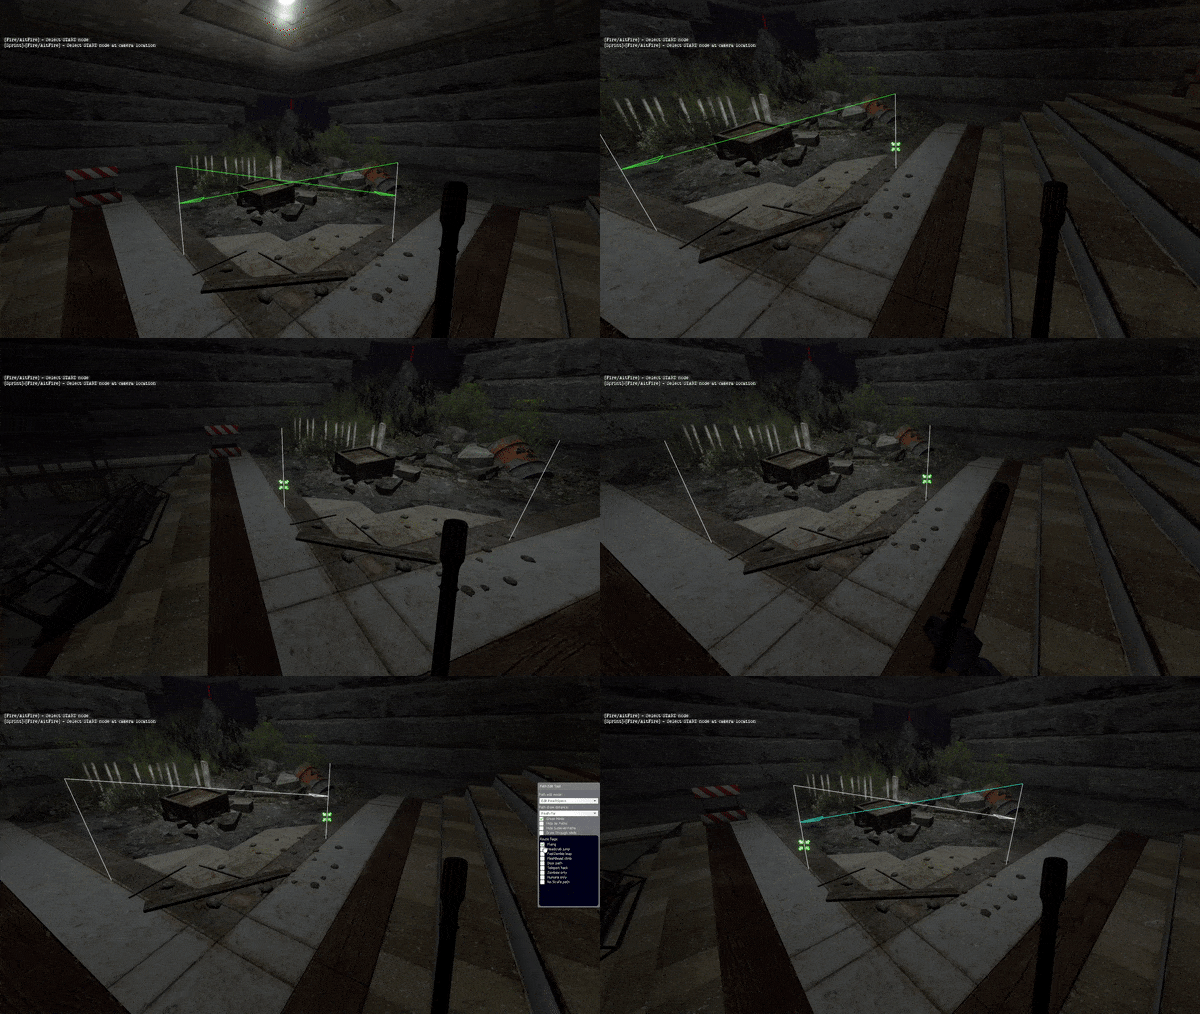
|
Path Types
Edit Nodes
A mode that allows you to replace a node to another location while saving paths for it. It must be used carefully, otherwise some of the saved paths may go through the wall.
Controls:
Node selection:
LMB – Select a node for replace
R – Select a node at the position of your gaze
Selected node:
LMB – Put the node in the desired position
R – Put a node on your position
RMB – Deselect
| Using: |
|---|
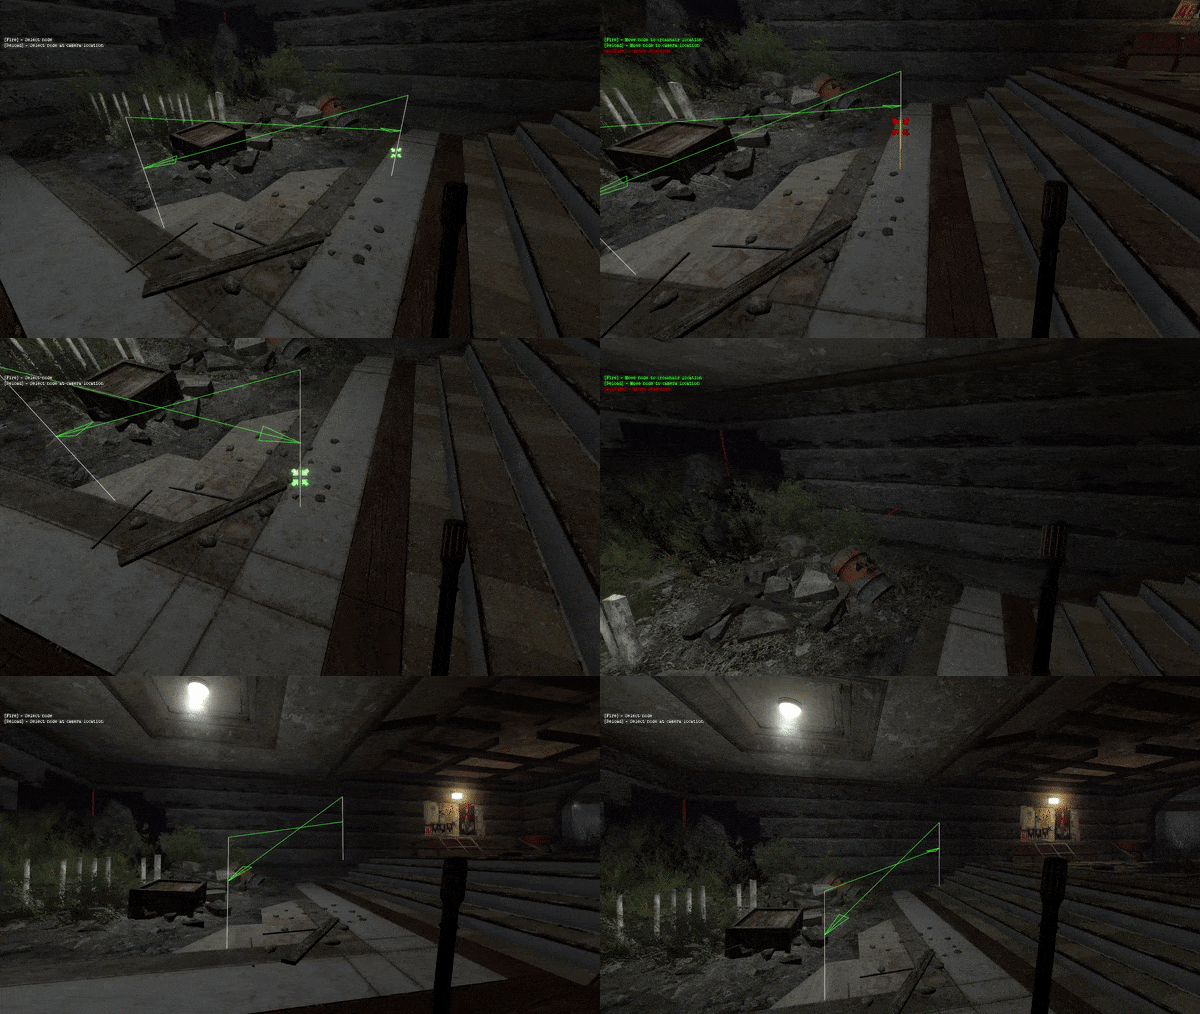
|
Volumes
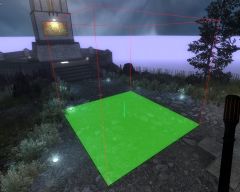
Allows you to create playerclip (invisible walls), trigger_hurts, etc. brushes. An extremely useful tool when used correctly.
Basically, it is very useful for placing brushes that will not let anyone pass to fix the map or fix the bots that are not working properly. The fact is, since bots automatically crouch/jump over obstacles, decorative geometry can cause disruption of their work.
For example, if the ventilation has a 1-unit brush at its exit, then the bots will jump on it instead of getting into the ventilation, which will cause them to get stuck. If you put block all volume on top, then they will use ventilation correctly. However, it will not have any effect on the gameplay. It also works the other way around, when bots need to jump, they can crouch and get stuck.
This brush is also used to cover elements that don’t greatly affect the gameplay, such as fences / handrails brushes, static fences / handrails props, any obstacles from static props, holes in the walls (through which a normal class cannot pass), etc. This can significantly fix bots pathfinding for their correct work.
This issue is due to the "pursuit mode". Bots at a distance of ~ 200 units stop moving exactly along the nodes and start moving exactly behind you, repeating some of your movements. But this mode works when there are no obstacles between you and the bot, which leads to bots getting stuck in some places
For specific examples, you can look at the maps:
zs_fear_nuclear (the hole for crawlers/headcrabs does not work correctly),
zs_obj_day_zero_v16 (the final part broke bots targeting because of fences and bad brush building),
zs_obj_filth_v19 (too many changes due to not using playerclip on the map itself),
zs_detriot_skylines_v1 (due to the fact that there was no playerclip on the brush fences, bots tried to go through walls with pursuit mode)
Controls:
General:
LMB - Create Brush
R - Remove brush
When creating a brush:
LMB - put the end point of the brush
Shift + LMB - put the end point of the brush at your position
RMB - Cancel Creation
![]() Bug: The brush after creation turns out to be a little larger than you want to create, so initially take a smaller area so that you get a smooth geometry!
Bug: The brush after creation turns out to be a little larger than you want to create, so initially take a smaller area so that you get a smooth geometry!
![]() Bug: If you are a mapper use playerclip on stairs, especially if you can shoot or hit through them! This breaks the bots targeting, and they start to malfunction.
Bug: If you are a mapper use playerclip on stairs, especially if you can shoot or hit through them! This breaks the bots targeting, and they start to malfunction.
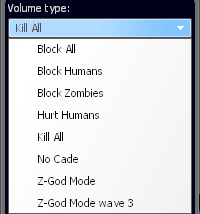
Volumes types:
The names speak for themselves what and how each type does.
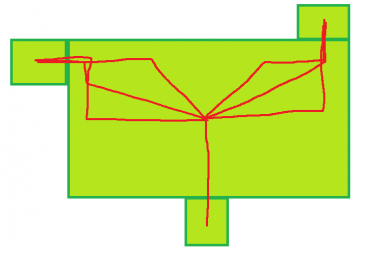
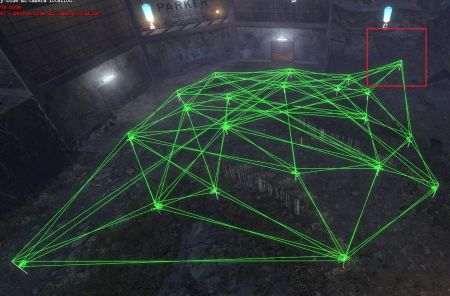
Allows you to create and edit "areas" - a special type of navmesh that is fundamentally different from nodes. Instead of placing multiple nodes in a room, you select space for the bots to navigate.
The navmesh made with areas is much more optimized and improves server performance but takes much more time to create. It is often combined with nodes, because nodes are a priority for bots and can be used to manage them more efficiently.
MarcoBots areas work differently from D3Bots, in fact, an area is a kind of nodes. Look at the picture for a better understanding of how areas work.
Controls:
Basic:
LMB - Add area start point
RMB - Delete area
R – Resizes an area
When the first point of the area is set:
LMB - Set the end point of the area
RMB - Delete start point
Flags:
Auto-Generate NavMesh - Not working and not used.
Navigate a nav area - Not used
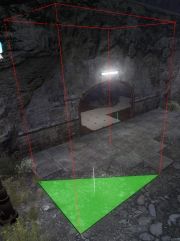
Use Triangle Mesh - Allows you to create a triangular area in the form of an isosceles right triangle (square truncated diagonally)
| Some materials to help you better understand how areas are created: | ||
|---|---|---|
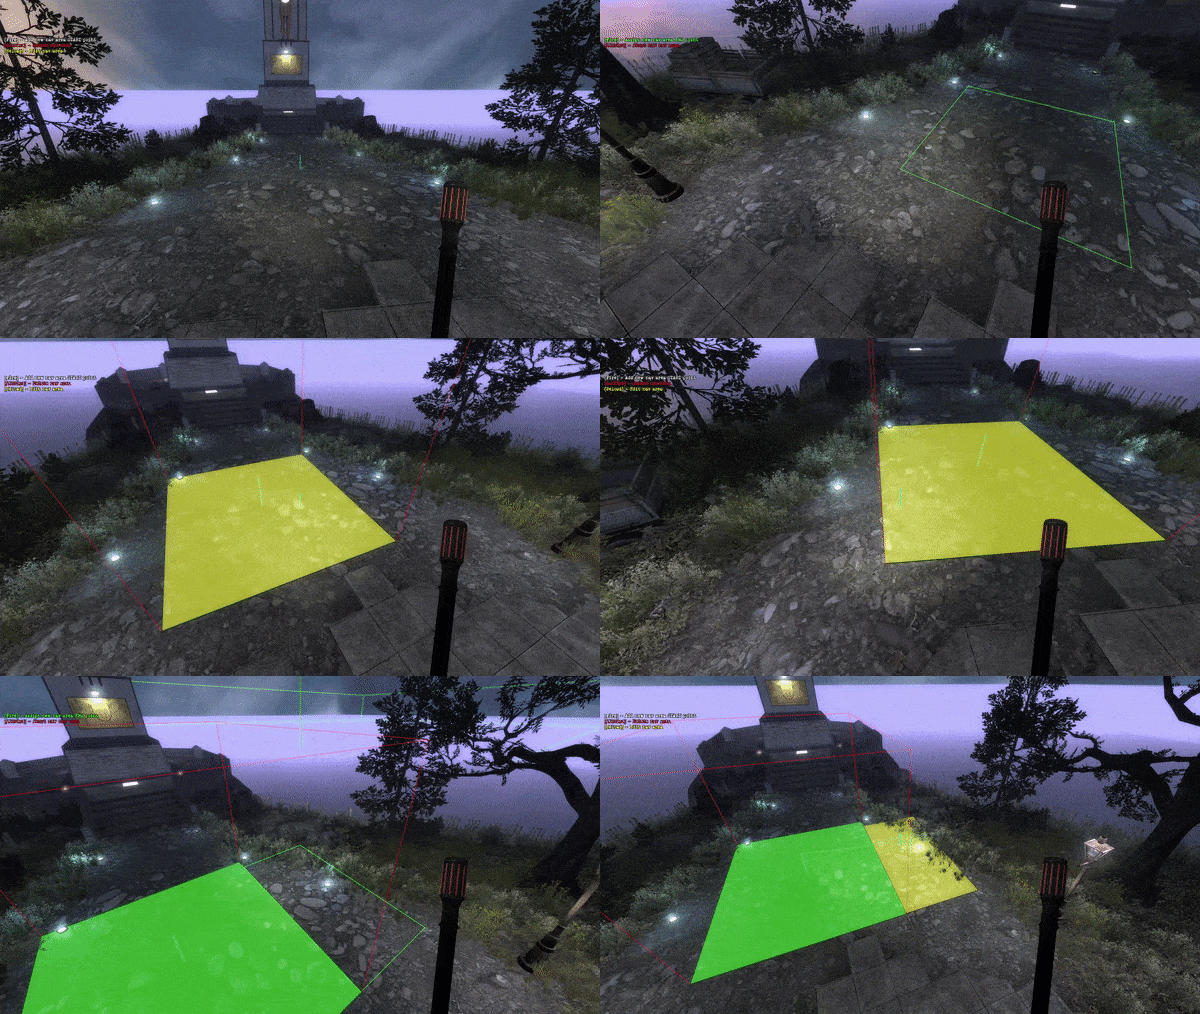
|
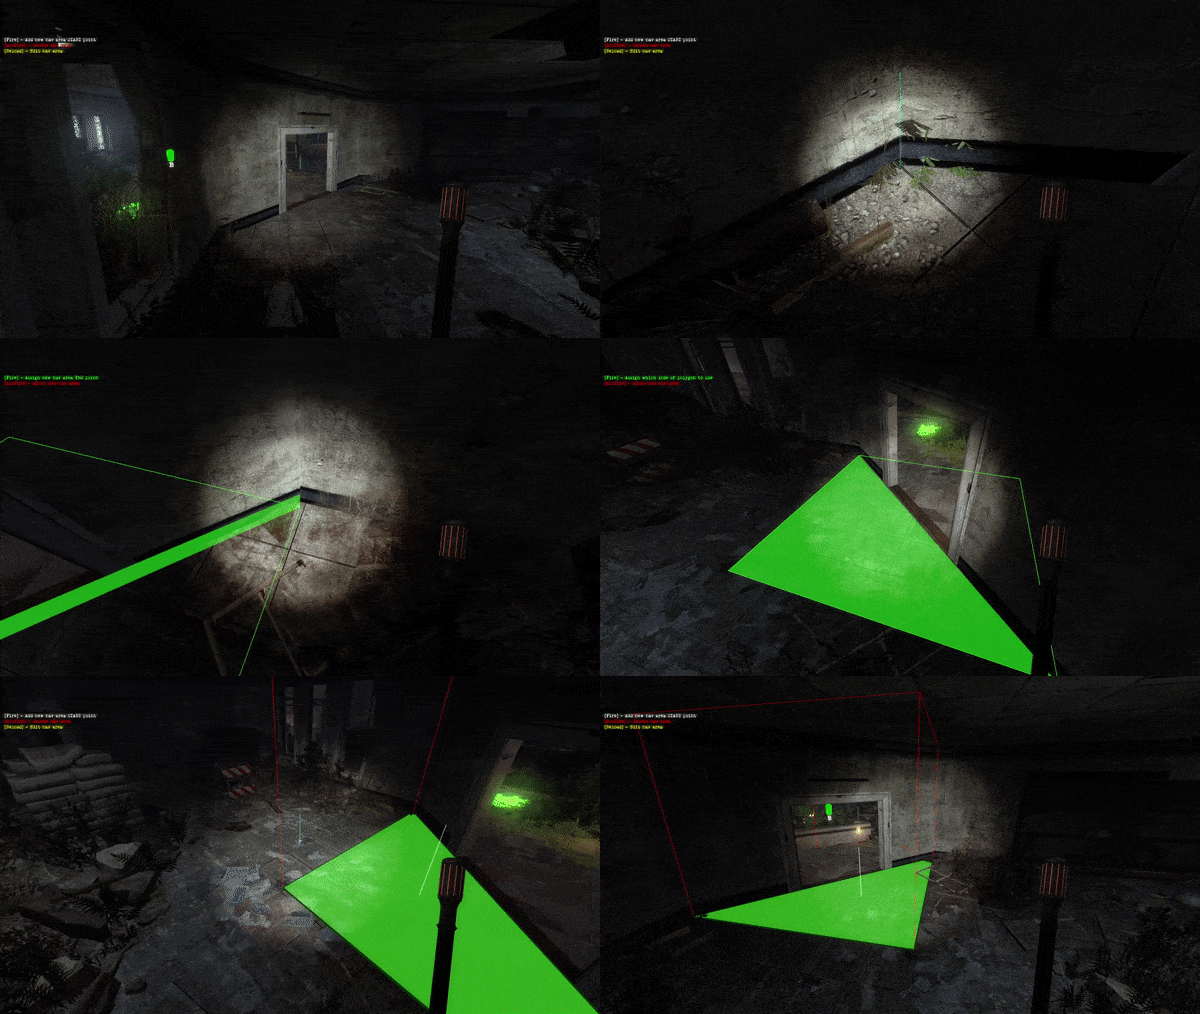
| |
More specific examples of creating navmesh using areas will be described below.
Settings
Used only by developers or SA.
Path Draw Distance
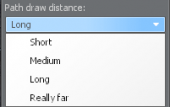
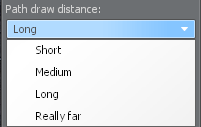
An extremely useful tool that allows you to change the drawing distance of the navmesh.
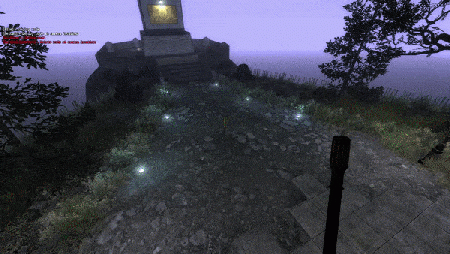
This can often help to find where some paths are going by setting the range to “short”; so that in some places the whole view does not turn into spaghetti; so that you can take the final navmesh photo.
Draw range also has a big impact on your fps.
| Look at this example to better understand how draw range can be used effectively: |
|---|
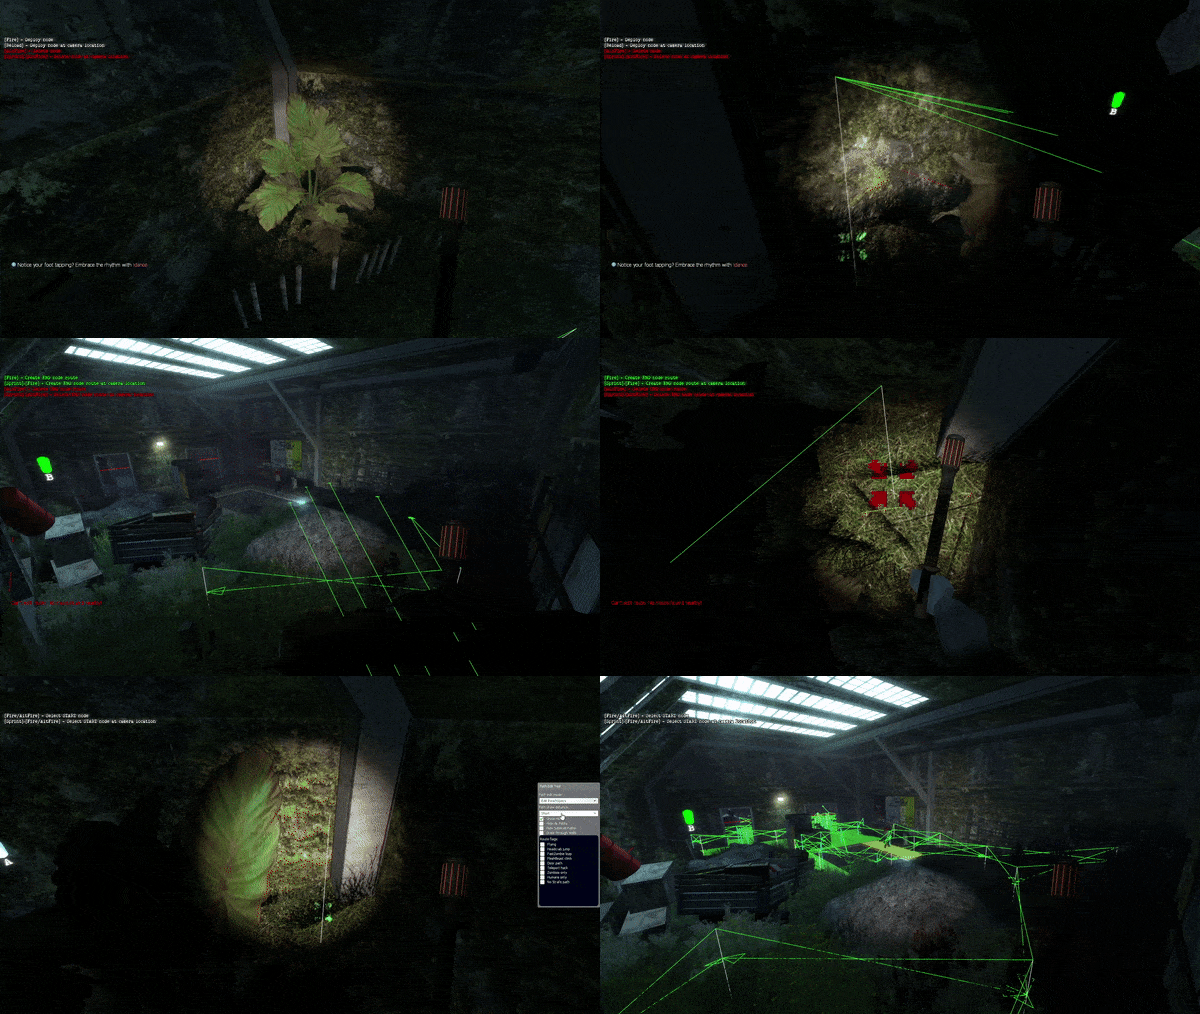
|
Navmeshing with nodes is the simplest and fastest navmeshing method. This method is often temporary till an area mesh is created, but the principles discussed in this heading will form the basis of any navmeshing method.
To create navmesh with nodes, you need to use the edit mode "Create node" and "Edit ReachSpecs". The nodes will automatically connect to each other if you place regular nodes. The red cube from each node will show the maximum distance at which the bot can detect you. But the fact that the distance is quite large doesn’t mean that you only need to place a couple of nodes on the map and your navmesh will be ready. You need to put the required number of nodes so that the bots can move freely around the map when they are not in "pursuit mode".
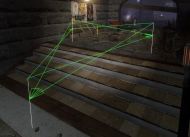
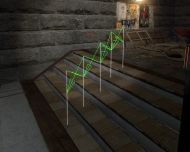
Consider navmesh for staircases. It is enough to put just a few nodes for the bots to work correctly. You don't need to put one node for each step.
Overall, this simple example shows that giving bots more freedom to overcome obstacles automatically will perform much better.
Now let's look at how to work with windows. The best way is to place one node near the window and one on the other side. Bots will treat the window as an obstacle to jump over, instead of jumping onto the node on the window. That is, the less you control bots, the better they will work.
Consider boxes as a final example. The principle of working is practically the same as for the stairs, but the “steps” have become larger.
![]() Tip: Don't place your nodes close to vertical surfaces like walls. If the node is close to the wall, then the bot next to these nodes will crouch! Bots will be an easy target for shooting.
Tip: Don't place your nodes close to vertical surfaces like walls. If the node is close to the wall, then the bot next to these nodes will crouch! Bots will be an easy target for shooting.
![]() Tip: Each node that connects automatically can be easily disconnected, because if you put another automatic regular node in front of this node in the direction of the path, then the paths switch to it.
Tip: Each node that connects automatically can be easily disconnected, because if you put another automatic regular node in front of this node in the direction of the path, then the paths switch to it.
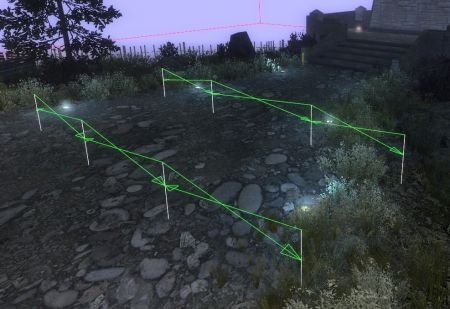
Let's create two stripes of nodes. Let's place auto regular nodes.
Now disconnect them using other nodes. Let's place a lot of auto regular nodes in the center and delete them. As a result, we will get 2 lines of nodes that will not be connected.
| Example in GIF for better understanding: |
|---|
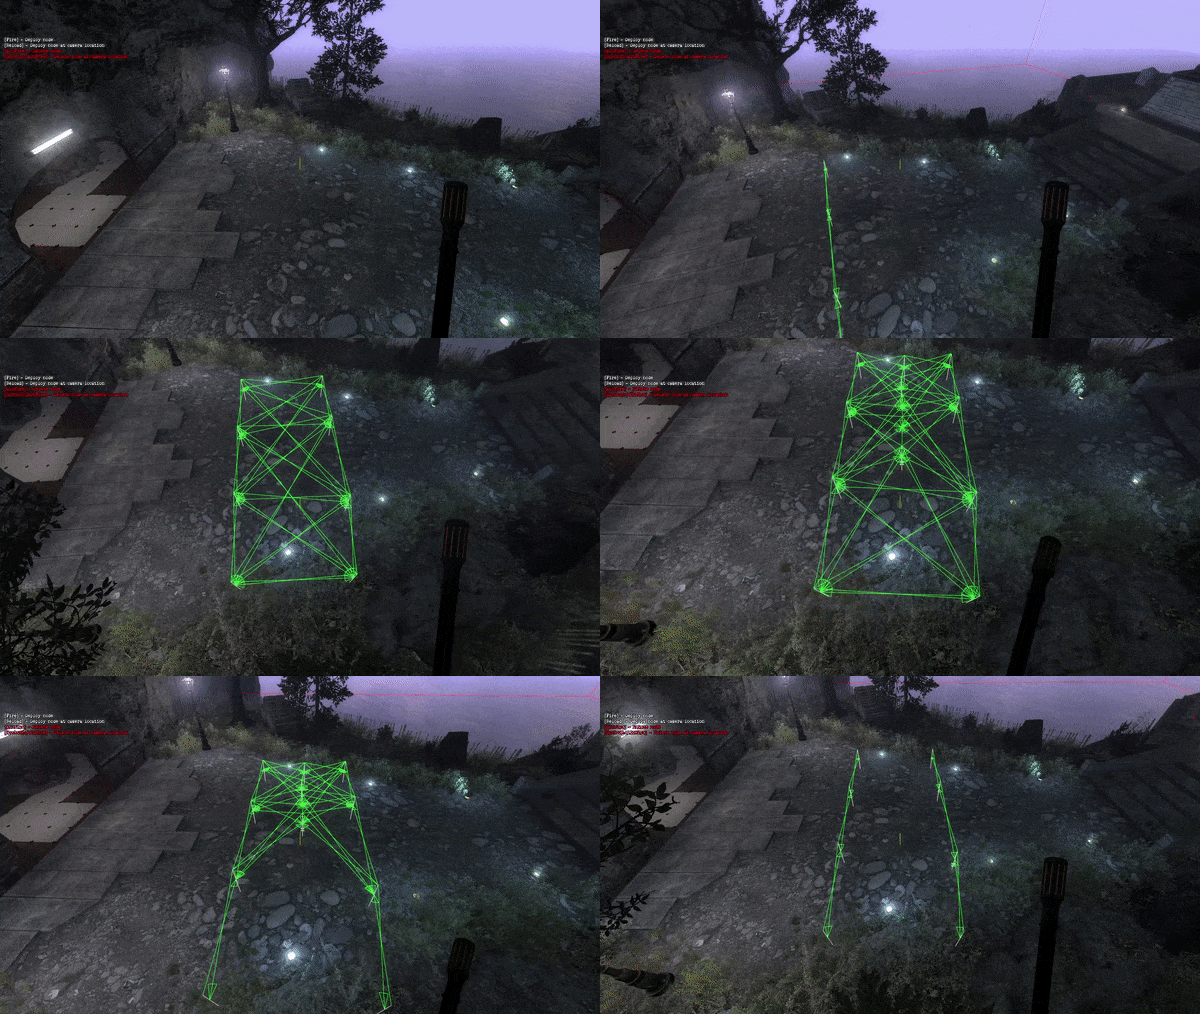
|
Now, let's say we need to disconnect some node or line of nodes from others. We use the same example described above
By adding a couple of nodes in front and deleting them, we can easily detach what we need
| GIF example: |
|---|
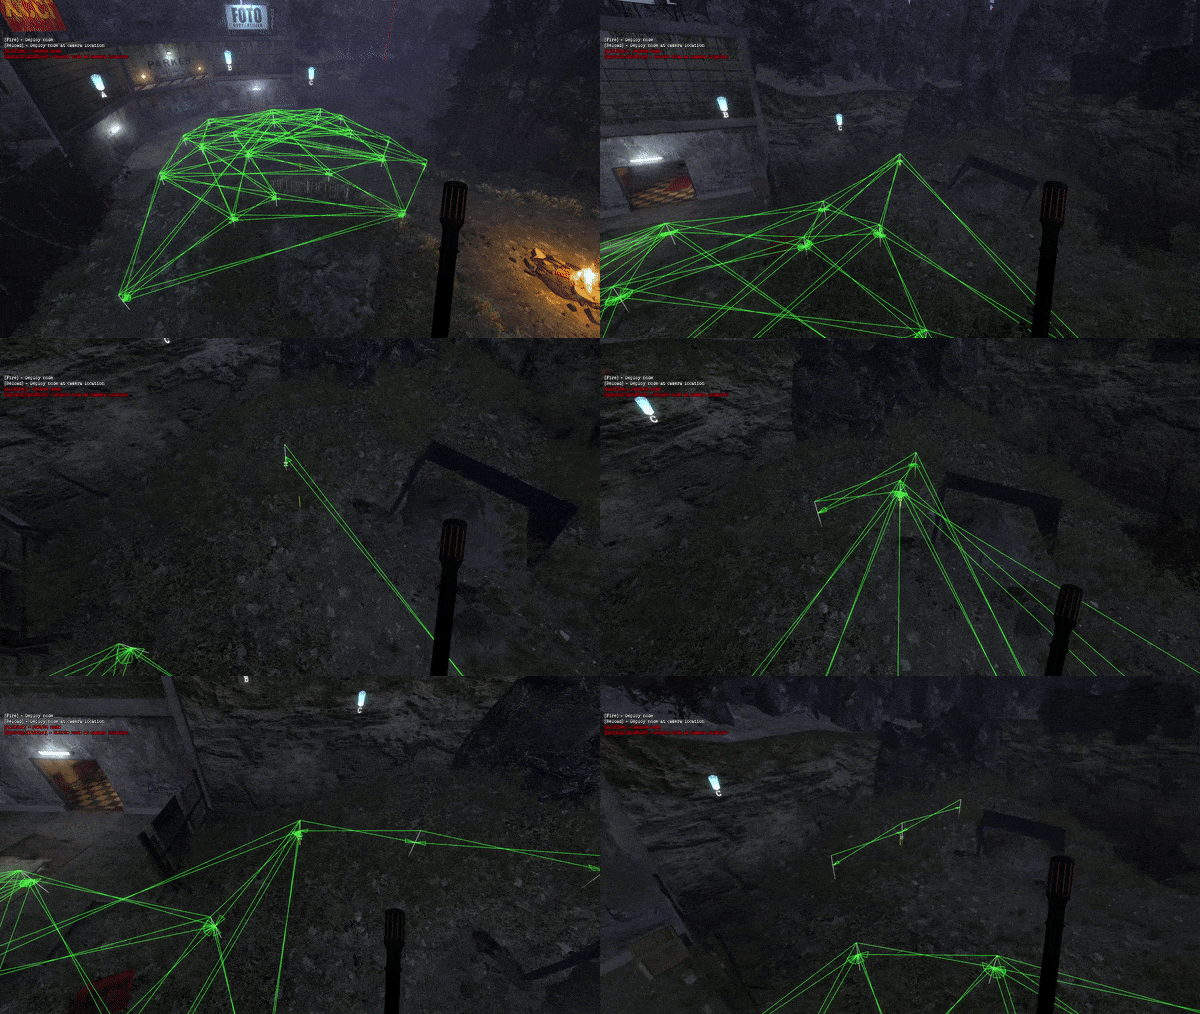
|
With this tip, you can very quickly delete auto paths, almost without resorting to using the Edit ReachSpecs mode, without connecting / disconnecting each node one by one.
If you think the auto-mode is "disgusting" and impossible to keep track of, then this tip and Path Draw Distance completely solve this problem and significantly speed up the process of creating a navmesh.
Navmeshing with areas uses the same rules as node navmeshing, except that you have areas instead of nodes. You should select an area where bots can find you.
It is important to understand that nodes and areas differ not only in the way they create navigation. Nodes are a priority for bots, so they will choose a node path rather than another.
This can often lead to issues when bots will walk on the same nodes indefinitely. Also, the ability to jump over doesn’t work for areas (i.e. bots will not jump from one roof to another, etc.), and the fast paths also don’t work. Therefore, you need to combine nodes and areas for a good navmesh.
The areas must be connected to each other. This means that to connect several areas, you need to create a small area in the doorway, etc., or use the method of nodes, connecting them with areas. If areas are much higher in relation to other areas (roofs areas), then they need to be connected to more distant areas so that the bots can jump much faster.
| This is very important as it can lead to incorrect pathfinding for bots. Let's take this example: | ||
|---|---|---|
![]() Tip: When creating areas in entrances, it’s much better to create an area slightly smaller than the entrance itself. Bots will get stuck less in front of the entrance and will move closer to the entrance center.
Tip: When creating areas in entrances, it’s much better to create an area slightly smaller than the entrance itself. Bots will get stuck less in front of the entrance and will move closer to the entrance center.
![]() Tip: Areas are easiest to create "from the corner", this will make it easier to find the area boundaries.
Tip: Areas are easiest to create "from the corner", this will make it easier to find the area boundaries.
When creating areas on complex geometry, such as circular and semicircular surfaces, complex surfaces with many props, rooms with many decorative elements, etc., you need to understand that you don’t need to mesh everything with detailed precision or don’t mesh something at all. You will be in one of the other areas, so it makes no sense to create it on small ledges, this will simplify navmesh several times
| Example of decorative beams on the walls: | ||
|---|---|---|
![]() Tip: For long staircases, it is a good idea to divide the area into several so that the areas correctly cover the surface! Also beware of the long staircase that have a ceiling.
Tip: For long staircases, it is a good idea to divide the area into several so that the areas correctly cover the surface! Also beware of the long staircase that have a ceiling.
| Example of Long Staircase Mesh with Ceiling: | ||
|---|---|---|
| Example for complex surfaces: |
|---|
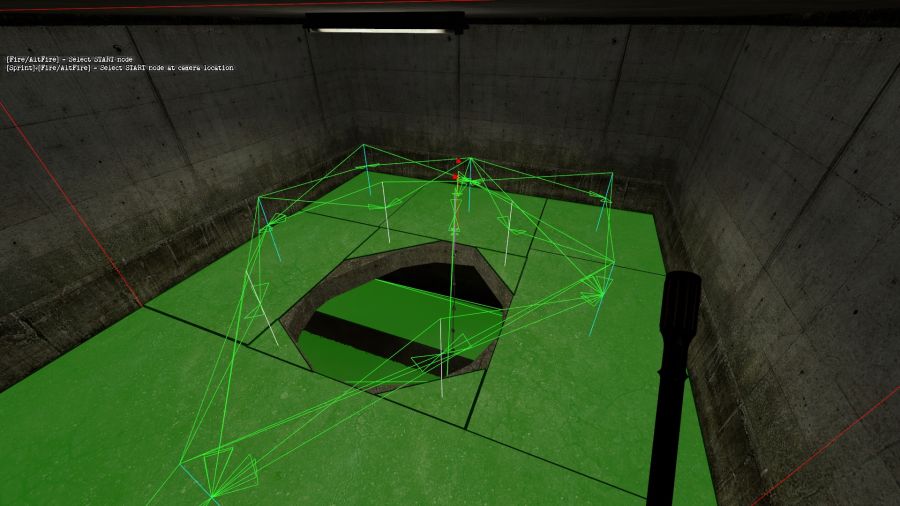
|
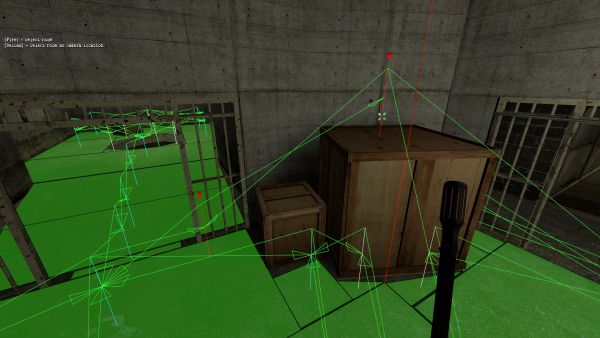
| For props, it’s much better to use nodes instead of creating multiple areas there: | ||
|---|---|---|
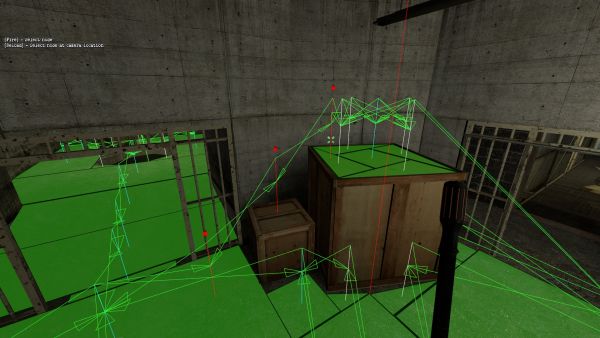
|
| |
![]() Tip: You can create areas underneath static props that you can jump over. Be careful with brush entities, as they may incorrectly create a detection area (red cube)
Tip: You can create areas underneath static props that you can jump over. Be careful with brush entities, as they may incorrectly create a detection area (red cube)
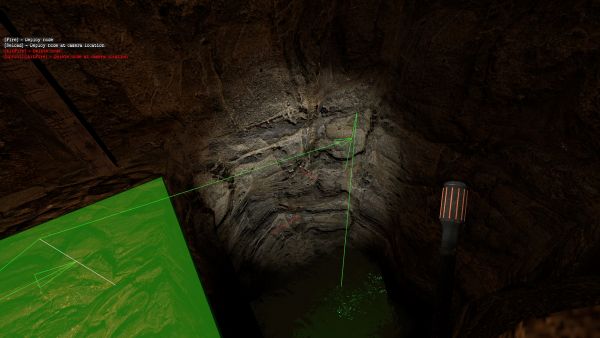
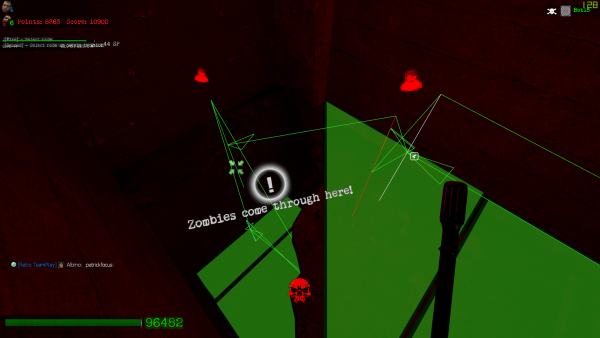
![]() Tip: When creating nodes to fall, put a no leave node in the air and put a regular node on the area. Connect them
Tip: When creating nodes to fall, put a no leave node in the air and put a regular node on the area. Connect them
|
| |
![]() Bug: Areas can automatically connect through thin walls or through props. Watch how they connect!
Bug: Areas can automatically connect through thin walls or through props. Watch how they connect!
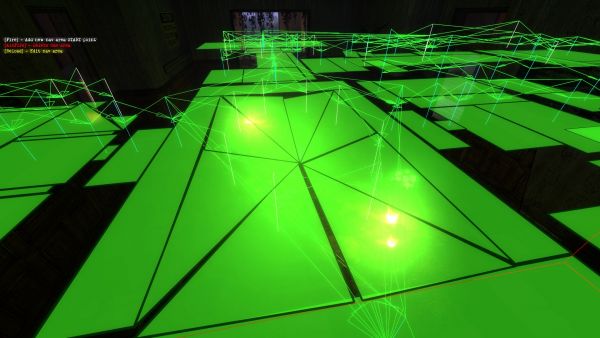
When creating areas on displacements, you need to be extremely careful, as geometry can often be quite tortuous, even if it does not seem so at first glance. It is recommended to create smaller areas so that they can approximate the displacement.
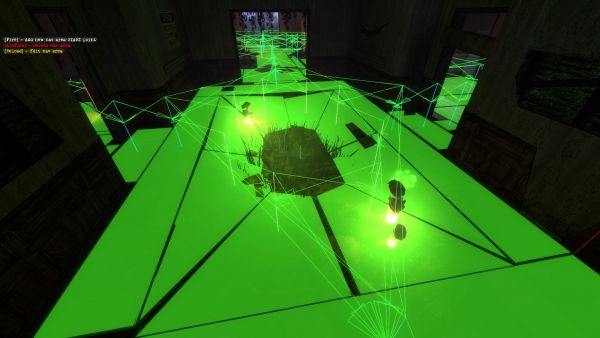
Triangle areas are an extremely useful tool for creating areas on displacements. Consider this example:
| Here is a "pit" that goes down from all sides, so it would be much better to use triangular areas: | ||
|---|---|---|
|
| |
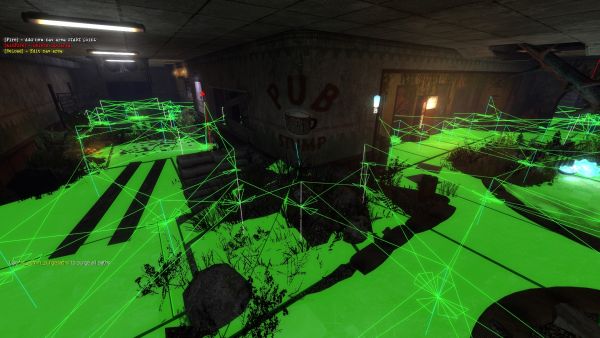
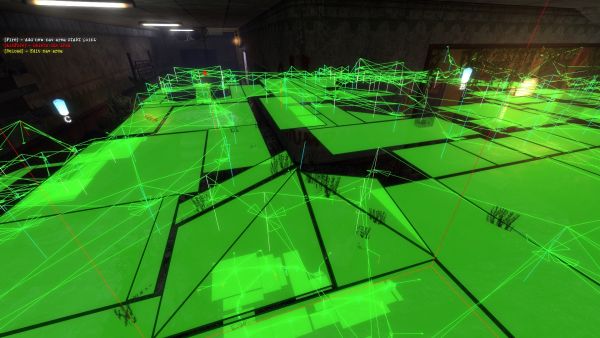
Let's look at another example. Here is a slide that rises to the wall.
| When using triangular areas, here we get: | ||
|---|---|---|
|
| |
![]() Tip: Triangle Areas are a very useful tool to create nice areas for almost any surface
Tip: Triangle Areas are a very useful tool to create nice areas for almost any surface
![]() Tip: Bots work much better underwater with areas than with water nodes. Try to make areas for underwater surfaces!
Tip: Bots work much better underwater with areas than with water nodes. Try to make areas for underwater surfaces!
 YouTube videos
https://youtu.be/LLGLuRNalYE - Area navmeshing
https://youtu.be/82vNoRpGTCs - Area navmeshing
https://youtu.be/eZBzQmPOGA4 - Area navmeshing remake
 Credits
MrDragonorg - creator and editor of this article.
- Special thanks to
- Sakura for helping fix, edit and create a video with creating navmeshes.
